Slow sync flash is one of the most creative ways to take pictures in low light situations. It’s a wonderful technique for freezing action and capturing motion blur at the same time.
So what exactly is it and how do you use it to improve your night photography? In this article, we’ll show you how it works and give you all the different ways you can try it. So let’s get started!
What Is Slow Sync Flash?
Slow sync flash involves firing your flash either at the beginning or at the end of an exposure that’s slower than average—for example, 1/8 of a second.
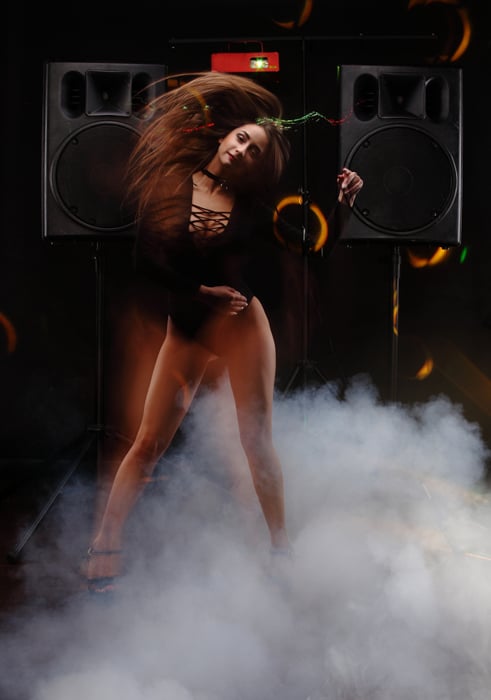
It’s tough to hold a camera steady enough for sharp exposure using slow shutter speed. But by firing the flash, you freeze the motion, collecting light trails in the remaining time. This process creates a beautiful effect, as shown in the photo below.
The Advantages of Using Slow Sync Flash
The main advantage of using longer shutter speed is that it allows you to collect more ambient light into a photo. Coupled with the flash, you now have the ability to freeze movement and keep your main subject sharp.
When you need to shoot in low light conditions but still want to maintain plenty of the ambient light detail without a high ISO, it’s best to use a slow sync flash.
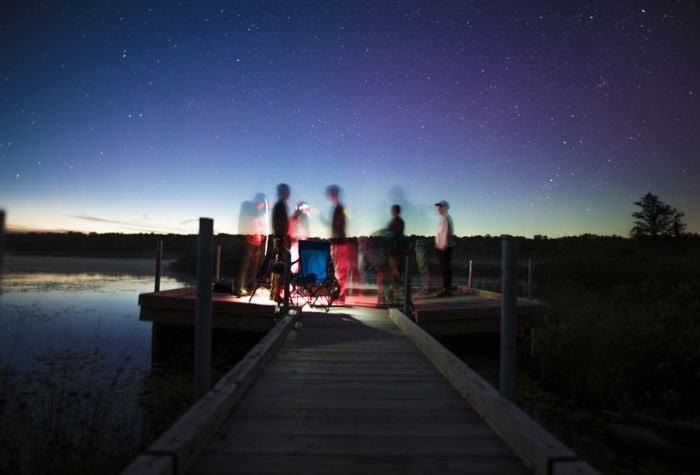
The image above was made possible using a long exposure. The stars wouldn’t otherwise be visible at all if regular settings were used.
How Do You Use Long Exposure Flash?
To get this to work, all you need is a camera with a flash and the ability to change the shutter speed. After that, you have two options: 1st (front) curtain sync or 2nd (rear) curtain sync.
Without too much unnecessary detail, 1st curtain flash means camera flashes at the beginning of an exposure. And 2nd curtain pertains to the flash firing right before the end of the exposure.
The importance of choosing the right one comes down to the fact that you’ll capture movement when you take a photo. The point at which you fire the flash dictates the type of blur you’re going to get.
1st Curtain Sync
This default setting is the standard way of shooting with a slow sync speed. Other than adjusting the shutter speed, it doesn’t require any particular set up to achieve.
The flash will fire when you depress the shutter. And then, the camera will continue to record light for the remainder of the exposure.
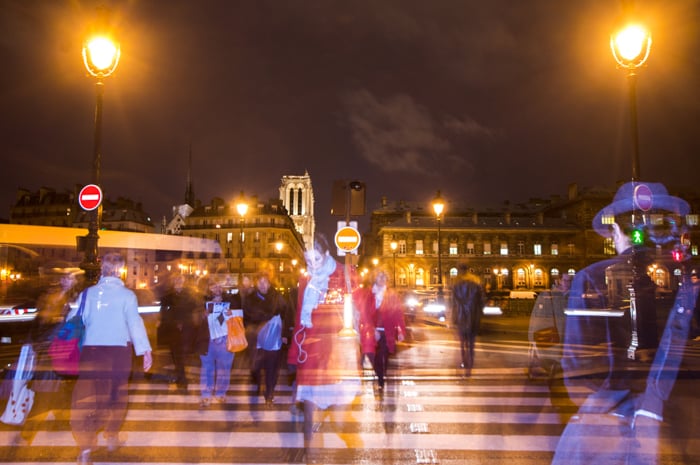
Shooting like this overlaps recorded movement with the initial exposure. In the photo below, you’ll see that some of the lights behind the subjects appear to be shining through their bodies.
One of the tell-tale signs of 1st curtain is that the light trails appear in front. The same trails would appear behind the subjects if the 2nd curtain was used.
1st curtain sync works well in some scenarios such as the example below. But in most cases, it tends to create dull images since it “superimposes” the background on the subjects.
2nd Curtain Sync
So if 1st curtain sync looks unflattering, how do you make the flash fire at the end of the exposure? The answer is 2nd curtain sync.
This setting activates the flash before the aperture closes. As a result, it exposes your subject over the top of any streaks or blurs your camera recorded first when your shutter opened. Any light streaks now go behind your subject, helping to draw the attention to them.
Now how do you sync your camera to your flash? Most cameras are different, so look in your manual to turn on this feature. Setting your flash to rear curtain sync on an external unit usually consists of clicking just one button.
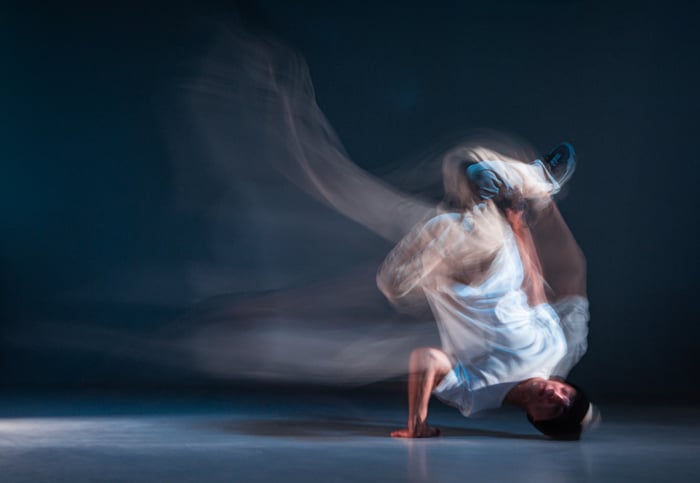
Adding movement to your camera while taking the photo produces some cool effects. You can have plenty of fun playing around with this technique.
I recommend having a good look around the scene first. Determine your available light and work out what would work in your photo.

Photo by Robert Zunikoff
Conclusion
The process of slow sync flash itself is easy. But do remember that you may need a lot of trial and error to get the shot exactly how you want it. So keep practising and study how flash affects your subjects and your images.
As you gain knowledge, you’ll figure out what to do and what you need to avoid. After a while, it will be easier for you to imagine what your photo will look like. Even before you press the shutter.
Examples of Slow Sync Flash Photography
Slow sync flash photography is one of the topics we cover in our creative photography course, Wow Factor Photography.
Below are some of the photos taken by our students. If you'd like to learn more, check out the course here.
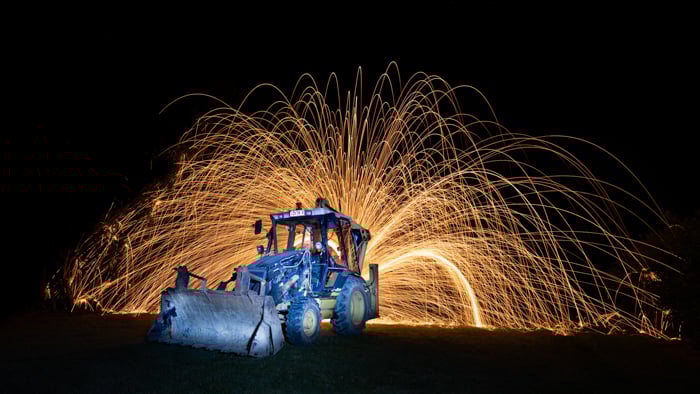
Photo by Debbie Sutton
Photo by Trina Thorwald
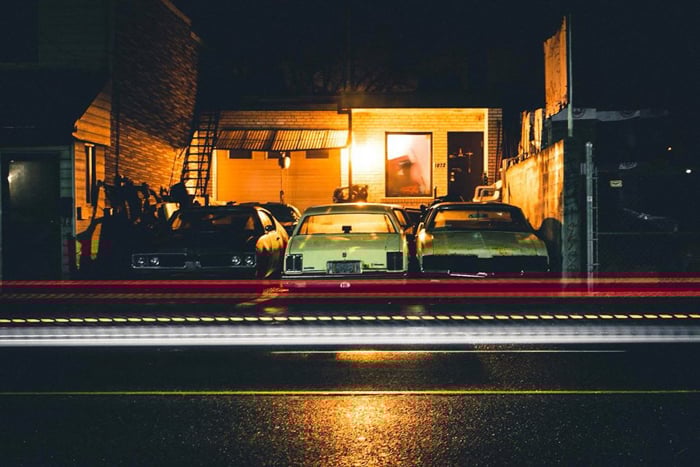
Photo by Jonathan Adediji


