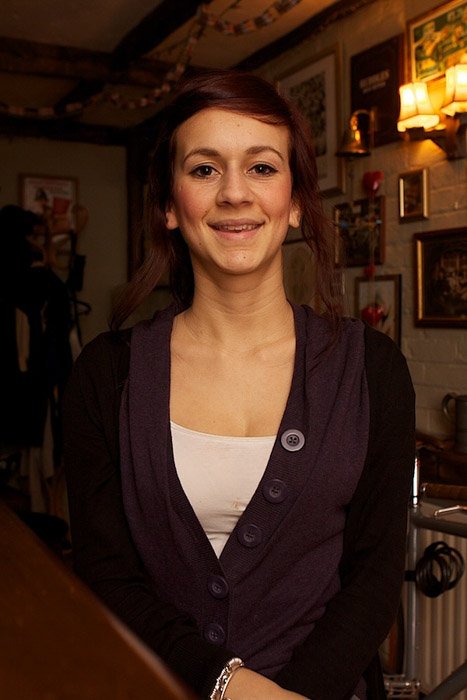
Capturing portraits with indoor flash photography is a great way to get professional-looking shots without having to go to a studio. By using the right techniques, you can create beautiful, well-lit photos that will make your subjects look their best. Here are a few tips for getting started:
How to Take Better Indoor Photos with an External Flash
This post is all about taking better photos indoors using an external flash. It covers the advantages and disadvantages of using different shutter speeds and apertures.
This first comparison is between shooting on full auto or program mode. I recommend moving away from shooting in these modes as soon as possible. They’re very limiting and you won’t be making the most out of your camera.
Program mode has its uses when you’re just learning how to use your camera. It will let you change settings such as ISO, exposure compensation and white balance. Relying on this mode will make learning to improve your photos a struggle.
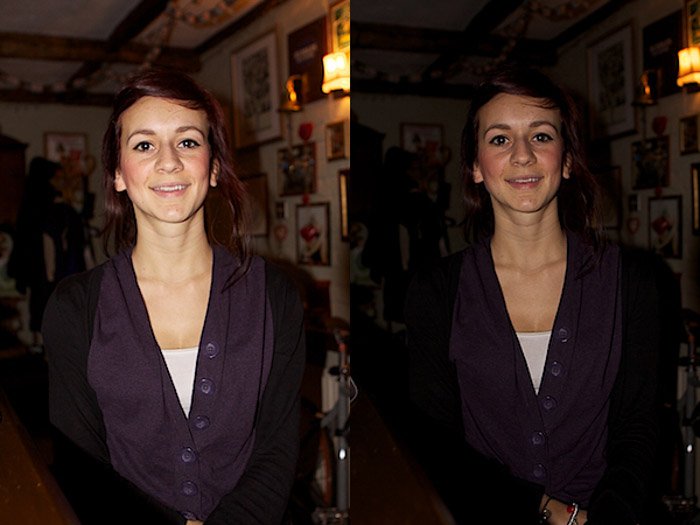
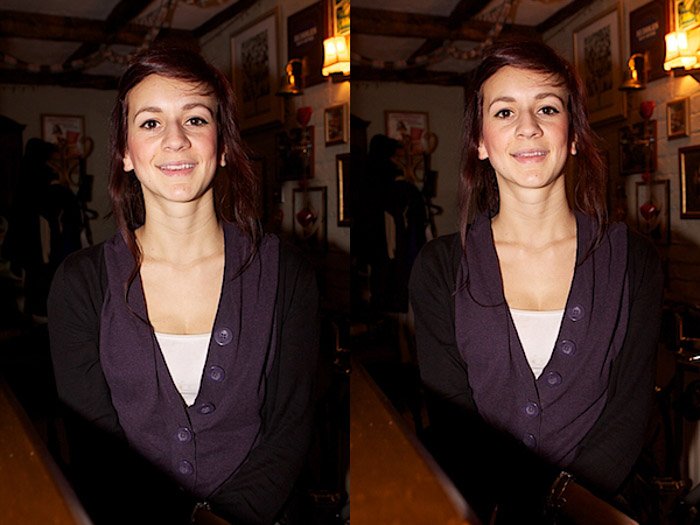
As I took these photos indoors in low light conditions, I used a flash for all of them. The photo on the left was in full auto mode. The settings the camera chose to use were ISO 400, f3.2 at 1/60 of a second.
As you can see, the foreground of this image is quite flat and harsh, with shadows present in the background. Although it’s worth noting that this mode has produced a well exposed background through it’s choice of ISO. The image to the right, shot in program mode, is a stark contrast to the first one.
Due to the harshness of the first photo, the flash exposure compensation has been turned down in this photo to -1ev. To let more natural light in, the aperture was reduced to 2.8.
The combination of these 2 changes on program mode with ISO 100 (chosen to produce the crispest image quality) has resulted in a rather dull and underexposed photo. That being said, the face looks a lot more natural.
This second comparison shows the difference between using the apertures 2.8 and 4.0:
As you can see, the first image has a much shallower depth of field.
These photos were taken using automatic selection focal points. This is fine when using a smaller aperture as it’ll have a deeper depth of field. When using a wider one (lower number), it can be shallow.
You should take care to make sure you’re focusing on the right points or you’ll end up with results like the top image. When shooting indoors on a single subject, I recommend a maximum aperture of 4 and, when shooting groups, 7.1.
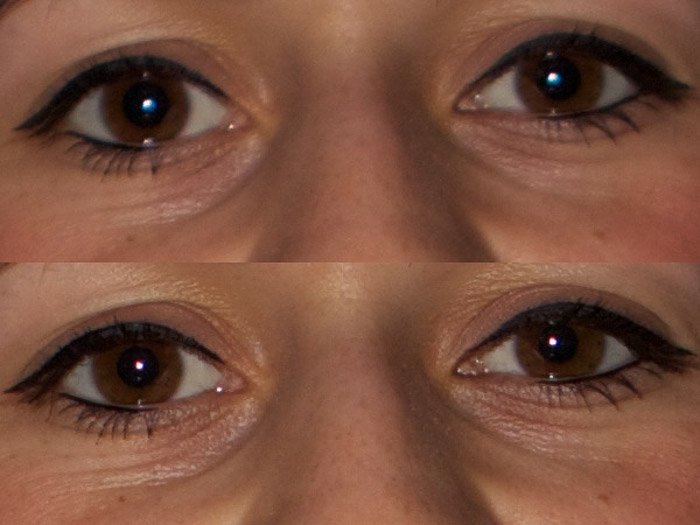
After taking the previous photos, I settled on f4 and 1/50 of a second with ISO 100. I changed the white balance to ‘Flash’. This had little effect compared to the auto mode so I reverted back to auto after these two photos.
This combination of aperture, allowing me to get the whole face in focus, and shutter speed slow enough to allow for camera shake, is ideal for indoor shooting.
Using an Off Camera Flash
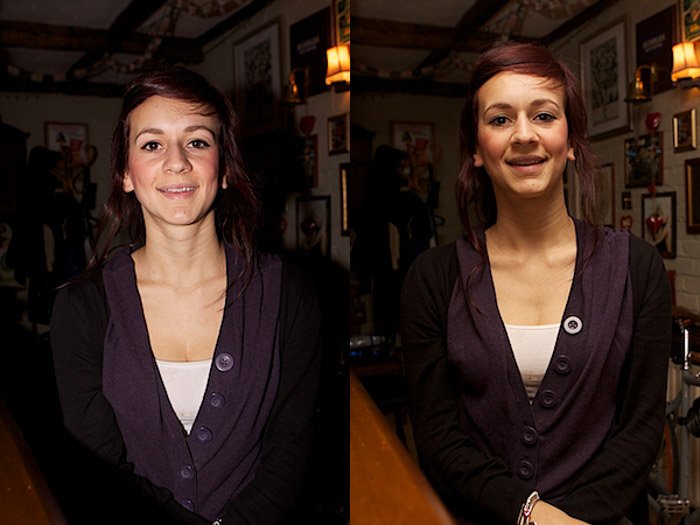
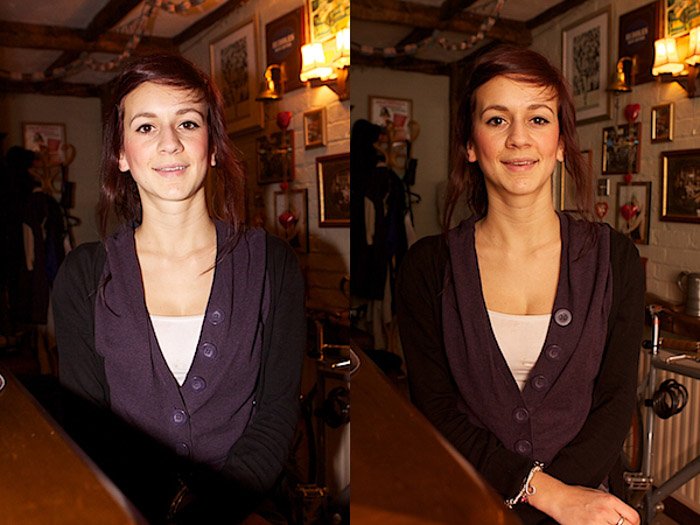
In the photos below I have used an off- camera Canon flash: the Speedlite 430EX ii. For the first photo, the flash is face on. For the second one, it’s at a 90° angle up towards the ceiling.
The photo with face on flash has much the same effect as a pop up flash. It flattens the images and casts a shadow. Pointing the flash to the ceiling has a much more natural, pleasing effect. But shooting close to the subject casts unnatural shadows on the facial features.
For the sake of this next experiment in different ISOs, I reverted back to using forward facing flash.
The first photo is ISO 400 and provides a good amount of detail to the background. The second photo is twice the sensitivity at ISO 800. This hasn’t provided much more in the way of detail, but has produced more noise.
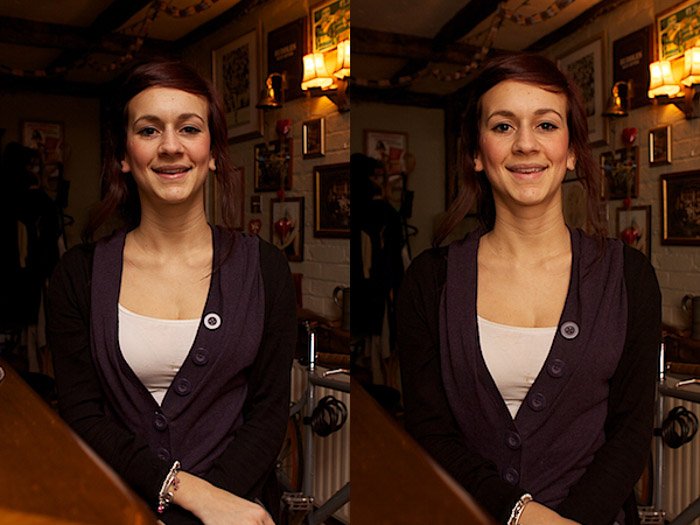
The image on the left below has an ISO of 1250. This overexposed the photo, giving it a very harsh appearance. The ISO I’ve settled for is 400. With a flash bouncing off the ceiling at 90°, it produces the photo below on the right.
When shooting close to your subject, you should take care not to cast shadows over their face with a bounce flash.
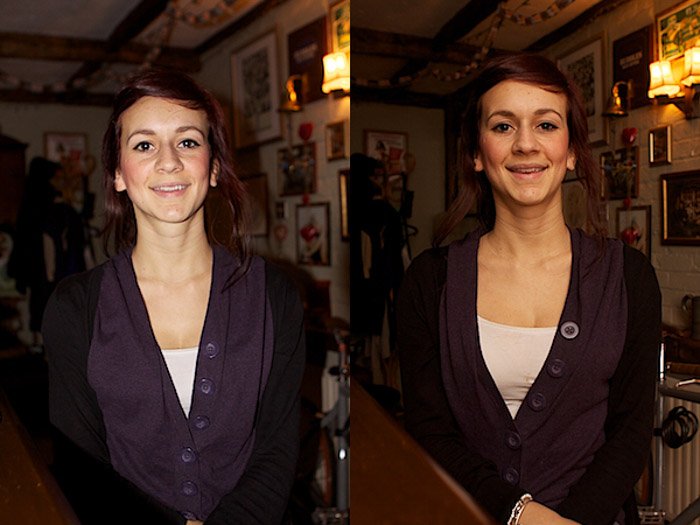
Here I tested two more angles to provide the best results. The photo on the left had the flash fired at 120° from the subject. The one on the right is at 150°.
The photo on the right at 150° provided the best results. It took the shadows and the shine from the face, appearing as though I didn’t use a flash at all. This is the desired result when shooting with a flash.
These settings worked for me in my environment. I recommend you experiment for yourself, as different distances and sized rooms can have different effects on results.
Final Results
Here is a comparison of the first and final shots.
I took the first photo with ISO 400, 1/60 and f3.2 with a pop up flash. For the final shot I used ISO 400, 1/50 and f.4 with a flash bouncing at 150° from the subject. These small subtle changes improved the image in many ways.
The first thing you’ll notice is that the lighting in the final image appears natural and less harsh. Secondly, the shadow in the background has gone. The background is much more in focus. The shadow from the bar in the foreground has also been removed. This reveals detail to the body of the model.
The facial features are more defined. This is because indirect flash allowed for some shadows to be cast where they ordinarily would be in an indoor setting.
Finally, and perhaps most subtle of all, there are no longer white ‘dots’ in the center of the eyes. This is a tell tale sign that a flash has been used. It also contributes to the unnatural look of a photo.
Here is the final image:
