

Texture in photography is the visible surface quality of a subject: the roughness of bark, the softness of wool, or the smoothness of glass. A photograph cannot reproduce touch, but light, shadow, and detail can suggest how a surface would feel.
To capture texture, start with light coming across the surface, focus on the detail that matters, and choose enough depth of field to keep it clear. The examples below show how to use these choices to add creativity and depth to your images.
What Is Texture in Photography?
Texture gives viewers clues about a material. Cracks can make stone appear rough; fine strands can suggest soft hair or fabric. Smooth surfaces have texture too, even when their most noticeable feature is an even reflection.
Texture can fill the frame, as in a close-up of a leaf, or support a larger subject, such as a portrait against a weathered wall. Patterns describe repetition; texture describes surface quality. They often occur together, but a surface does not need a repeating pattern to feel textured.
Contrast and the direction of light can make texture more visible. Depth of field controls how much of that detail appears sharp. An editing program can then refine the result.
Photographing an existing surface is different from adding a texture overlay in editing. We will cover capture first, then examples of combining texture photographs with portraits.
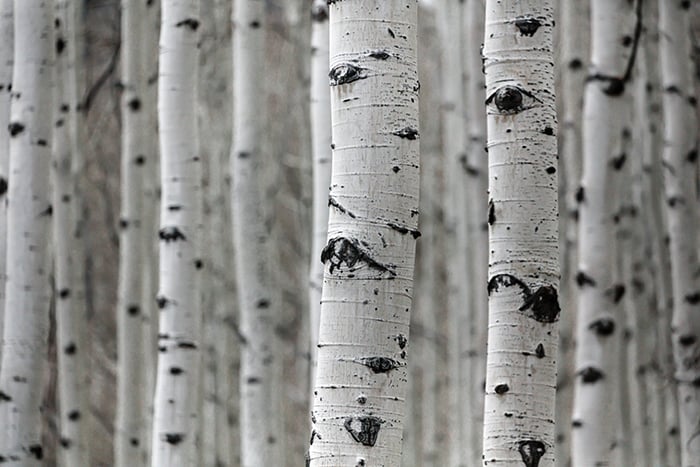
How to Photograph Textures – Settings and Camera Tips
There is no minimum aperture for texture photography. A higher f-number means a smaller lens opening and, with other conditions unchanged, greater depth of field. It does not mean that the camera always records more detail. Very small apertures can soften fine detail through diffraction.
For a still surface, try this starting sequence:
- Choose the framing. You can use almost any lens. Move close enough to show the texture without going inside the lens's minimum focusing distance. For a flat surface, keep the camera facing it squarely so one edge is not much closer than the other.
- Set the aperture for the depth you need. Try f/5.6 or f/8 as a starting point on a camera with an adjustable aperture. Inspect a test shot, then stop down if important areas are out of focus. For close-ups, check both the nearest and farthest details. These settings are starting points, not a rule for every camera or subject.
- Focus on the important detail. A wider aperture can isolate one part of a surface and give you background blur or bokeh. Use it deliberately when you do not need the whole texture sharp.
- Balance shutter speed and ISO. Use a shutter speed that prevents camera or subject movement from blurring the image. Keep ISO low when the available light allows it, but raise it if that is what you need to avoid motion blur.
- Check a magnified preview. Look for missed focus, movement, and lost highlight detail before changing your setup.
Nikon's aperture guide explains the depth-of-field tradeoff. For close work, Canon's macro sharpness guide also explains why stopping down too far can reduce definition.
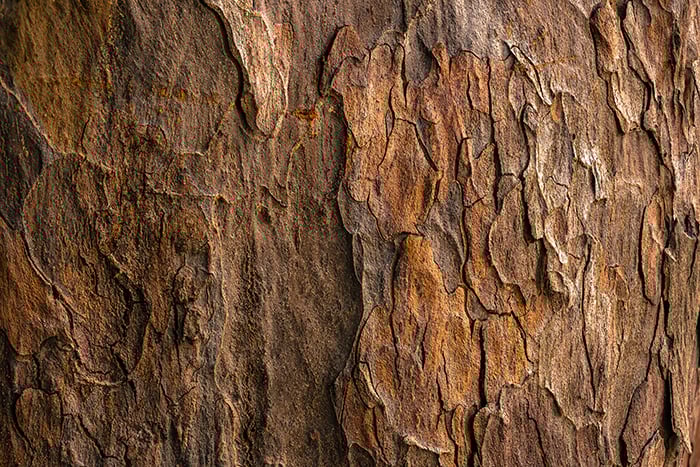
A tripod helps when you use a slow shutter speed with a still subject. Use the self-timer or a remote release to reduce movement from pressing the shutter. Neither will freeze leaves moving in the wind; that needs a faster shutter speed or a still moment.
Camera shake can affect any genre, but it is especially easy to notice in fine surface detail. If you want deliberate motion blur, choose it as part of the image rather than treating every soft area as a fault.
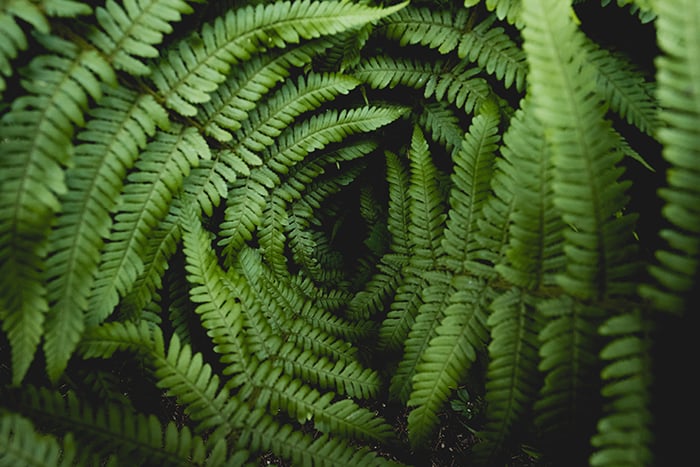
The blurred foreground helps draw attention to the sharper fern leaves. Blurred foregrounds can frame texture in photography, create the illusion of depth, and make your photos look dreamy.
How to Find Beautiful Texture Photography
Textures are almost everywhere. Look for a surface with a clear visual quality, then decide what you want the viewer to notice. A few useful subjects are:
- Rough surfaces: tree bark, brick, cracked stone, and peeling paint.
- Soft surfaces: wool, feathers, moss, and folded fabric.
- Smooth surfaces: glass, polished metal, and still water.
- Layered surfaces: overlapping leaves, scales, and stacked paper.
On a photo walk, use your smartphone camera to record subjects and light you want to return to. At home, try desks, bedsheets, or wallpaper. Changing your distance can turn a familiar object into an abstract composition.
For a simple exercise, photograph one surface from three distances. Make one frame that identifies the object, one that fills the frame with its texture, and one that isolates a small detail. Compare which image best suggests how the surface feels.
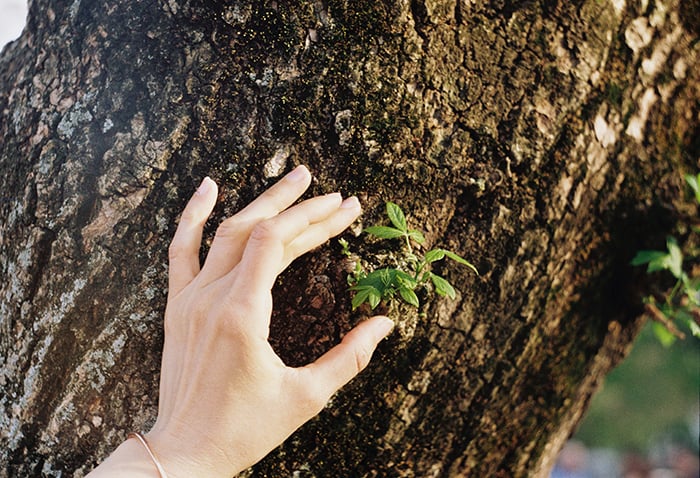
Parks or forests are some of the most accessible places for textures. Look for bark, leaves, and other details along an accessible route.
How to Make Your Own Textures
You can make your own textures out of anything you can possibly imagine. Try making an art piece. It doesn’t have to be a masterpiece for you to use it to create eye-catching textures for photography projects.
Even an awkward sculpture has textures that could look beautiful in a macro photo.
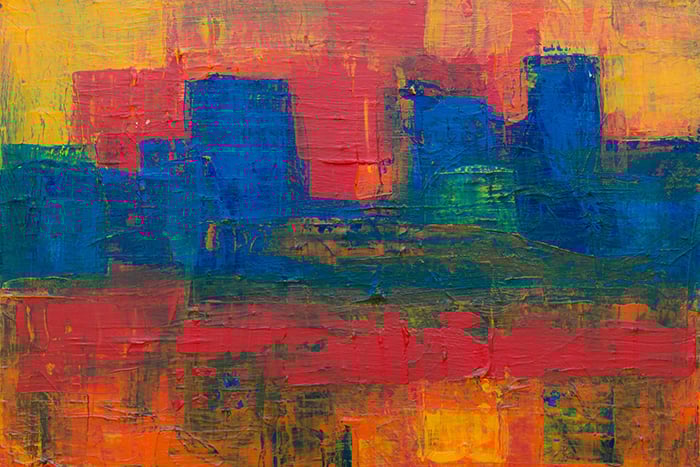
The random smoothness and roughness in these textures makes this photo stand out. The best part? You don’t need to have an art degree to create something similarly stunning.
To create your own textures, you can:
- make an abstract painting;
- collect and organize natural objects like pebbles, leaves, or dried flowers;
- photograph things like flour, feathers, and water in motion.
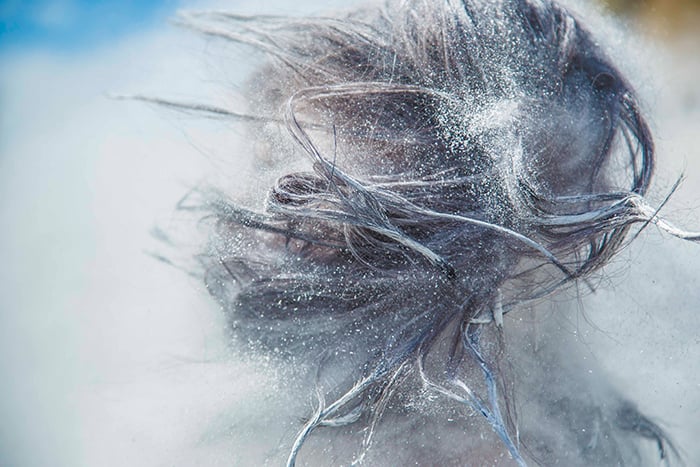
Flying hair and flour are a great (but messy) combination. It can result in unpredictable textures. If you love action photography, you’ll enjoy combining movements with random objects for the sake of texture photography. If you want a cleaner alternative, try spraying water (a garden hose will work wonders) or throwing leaves at your subject.
How to Use Light to Add Depth to Your Textures
The direction of light often matters more than the time of day. Light coming across a rough surface creates small shadows behind its raised edges. Light close to the camera's direction tends to hide those shadows and make the surface look flatter.
Try a piece of bark beside a window. Turn it until the light travels across the ridges, then compare that image with one lit from the front. With a lamp or torch, move the light while keeping the camera and subject still. This makes the effect of each lighting angle easier to see.
Hard side light can make a texture look pronounced. Softer side light gives gentler transitions while keeping some depth. For shiny or smooth subjects, look at the reflections as well as the shadows. Change the light or camera angle if glare hides the surface.
Morning and evening natural light can reveal texture with long shadows. Midday light can also work, depending on the surface and its angle to the sun. There is no single best time for every subject.
Dim light does not automatically make a photograph grainy. It can force a slower shutter speed or higher ISO, which changes the risk of blur or visible noise. Use support for a still subject, add light, or adjust your settings to keep a sharp photo.
You do not need professional lighting equipment to compare these effects. Start with one light and a simple background. Change one thing at a time: direction first, then softness and brightness.
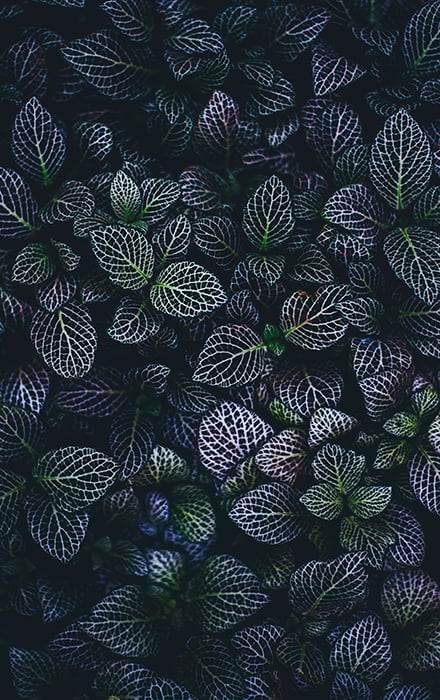
If the shadows weren’t so intense in this image, it would look flat. Thanks to the subtle highlights and vignettes, the texture of the leaves stands out.
How to Use Texture in Photography Portraits
In portrait photography, hair, skin, and clothing all give you ways to use texture. Decide which details serve the portrait. More visible skin texture is not automatically better; the lighting should fit the person and the result you want.
You can also use texture in a portrait background. Even when the background is out of focus, its shapes and tones can complement the face. Keep busy details away from the subject's outline if they draw attention away from it.
Choose background colors with care. A color scheme can help you plan how the subject and surroundings work together.
In my experience, pastels, wrinkled surfaces, and plain colors enhance portraits the most.
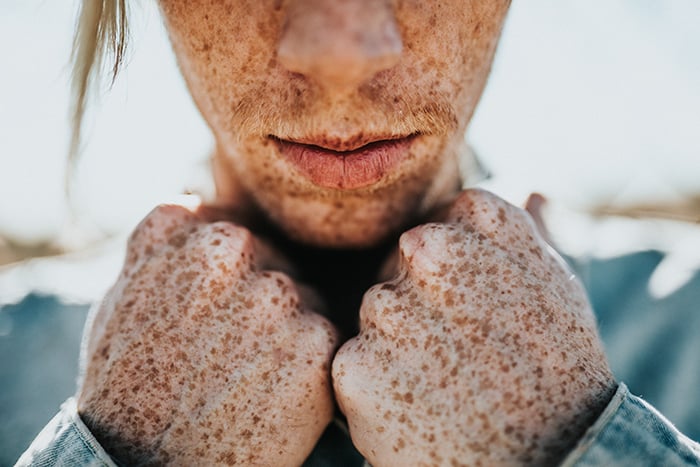
Textures like this are great for photo shoots that feature diptychs (a photo collage made of two images), special events, and subtle details that clients don’t want to forget.
How to Create Stunning Double Exposures Using Simple Textures
A texture photograph can also become a separate layer in an edited image. A texture overlay places surface detail over another photo; a digital double exposure combines two images into one composition. Combining more images creates a multiple exposure.
A silhouette is a useful starting point, but it is not required. You can combine a landscape, portrait, or texture with a second photograph. In an editor that supports layers, try changing the texture layer's opacity and blend mode, then mask areas where it obscures the subject. The examples below show different ways to combine the images.
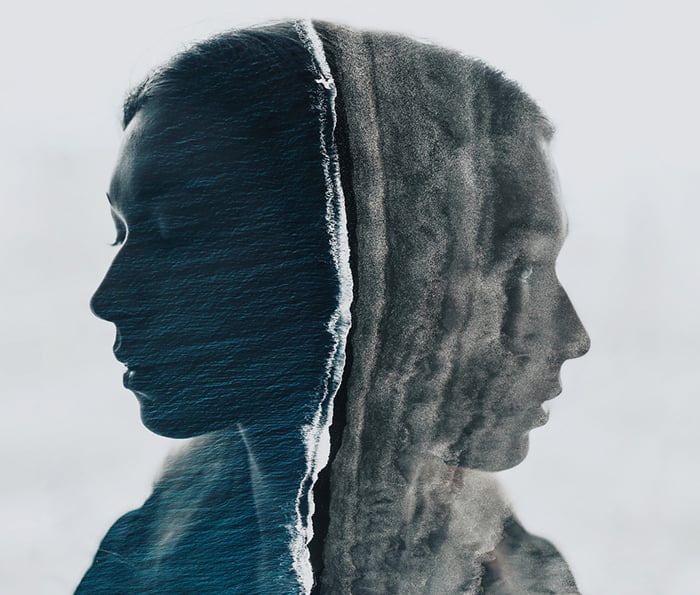
If you want, you can include multiple textures in your images. This photo was an experiment/accident that inspired me to use two different silhouettes and one image. The texture is actually one photo of a beach. The crashing waves created a division that made me think of different identities. None of this would’ve happened without the help of the texture itself. Keep this in mind when you work on your double exposures and make sure you experiment with as many resources as you can.
During any photoshoot, I spend a few minutes photographing textures and landscapes. These are useful for potential double exposure projects. I then save them in a special resource folder.
The photos you collect might not seem useful now, but they may come in handy later. Sometimes, I create double exposures using textures I photographed many years ago!
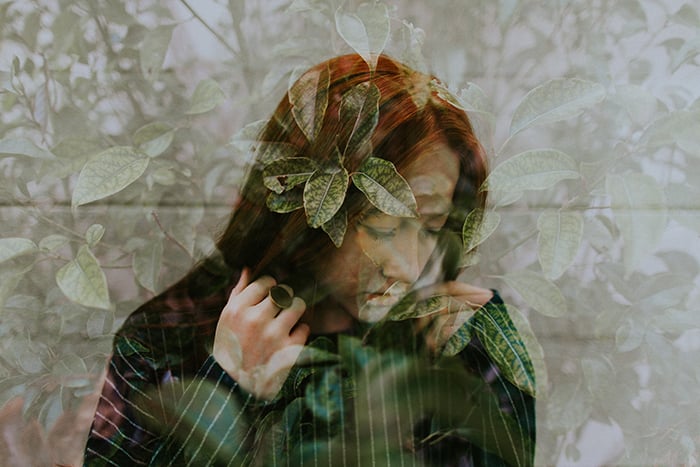
Sometimes, double exposures don’t feature silhouettes. This photo consists of two images: a simple portrait with a plain wall to leave room for the second photo, and a detailed photo of leaves.
How to Edit Texture in Photography
Editing can strengthen texture that you captured, but it cannot reliably fix missed focus or camera shake. Start with exposure and white balance, then make small adjustments while comparing the result with the original.
In Lightroom, these controls have different jobs:
- Texture: Adjusts the prominence of medium-sized details. Increase it gently to emphasize a surface, or reduce it where you want a softer look.
- Clarity: Changes midtone contrast. It can make detail appear stronger, but large adjustments can make the result look harsh. Check skin, edges, and smooth areas as well as the main texture.
- Contrast: Changes the overall separation between light and dark tones. Stop before important highlights or shadows lose their detail.
- Shadows and Blacks: Adjust darker tones and the black point. Darkening them can add depth, but crushed shadows can hide the texture you want to show.
- Sharpening: Adjusts edge definition. Inspect the image at 100% when you set it, and avoid sharpening smooth areas or noise more than needed.
Adobe's Texture and Clarity tutorial explains their different effects. Its Lightroom Classic sharpening guide shows how Amount, Radius, Detail, and Masking affect edges.
You can also edit texture photographs in Photoshop or GIMP, though the tools and controls differ. Judge the visible result rather than trying to copy slider values between programs.
The original example below uses contrast, clarity, shadows, and blacks.
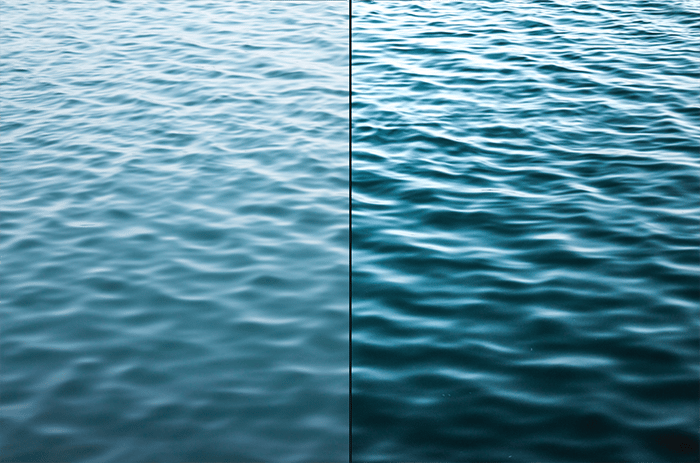
Playing with the sliders mentioned above resulted in a sharper, more eye-catching photo. As you can see, even smooth textures can be enhanced with the help of clarity and shadows.
Start with one surface and compare two lighting directions. Once the texture reads clearly, refine the focus, framing, and edit. This gives you a useful way to practise before collecting more subjects.
What I love the most about this genre is that it sharpens the senses. The more textures you photograph, the more beauty you’ll find wherever you go. And the more photo opportunities you’ll discover.