If you’re looking to add a touch of artistry to your portraits, you may want to try creating a Picasso style portrait in Photoshop. In this article, we’ll show you how to create a Picasso-style portrait using a few simple steps. We’ll also provide a few tips on how to get the most out of this technique. So if you’re ready to try something new, keep reading!
What is a Picasso Style Portrait and How Does It Work?
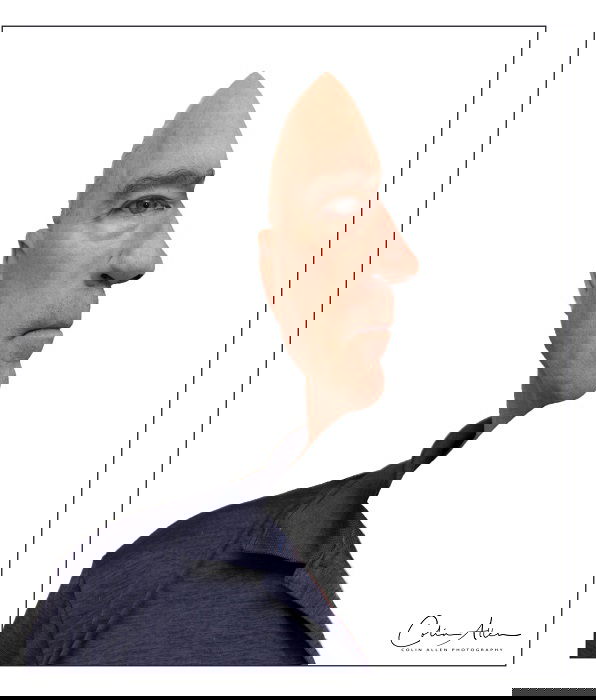
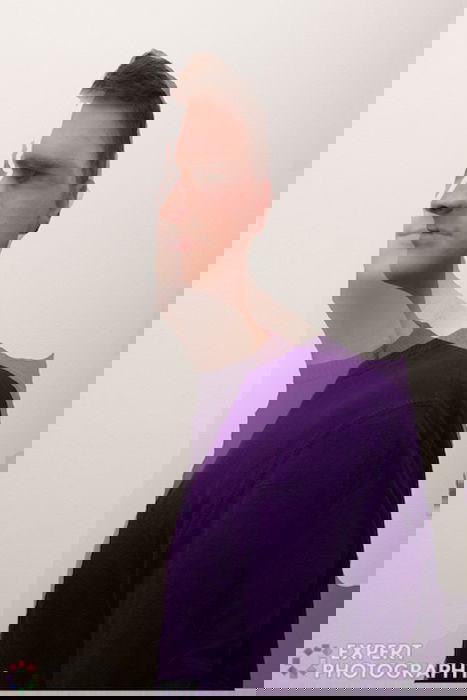
The idea of this photo is to create a cross-section of yourself by intersecting two photos. The new image will give you the illusion of a face facing straight and to the side at the same time. This confuses the eye. The final illusion is similar to Picasso’s iconic style.
The side-facing photo makes up the left profile of your body. It is incorporating different body parts such as mouth, nose, and hair.
Your front-facing image accounts for your right profile while using your hair, eye, ear, and nose as key facial features.
The bit where it gets tricky is where the two images merge.
The main merge points of my photo are the eyes, nose, and hair. They combine together to confuse the eyes and create such a weird illusion.
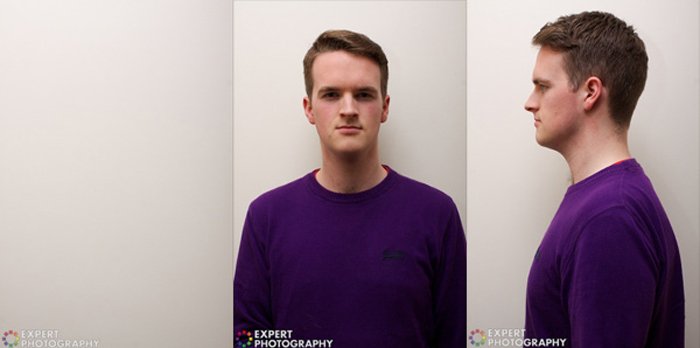
1. Take Three Pictures
I say three pictures; it will probably end up being more like 50 as you struggle to find a smile that you like. Take one photo facing the camera, a second looking to the side at 90 degrees, and the third of your background.
Suggestions for Finding the Best Pose
Let me walk you through my suggestions and what I learned from the experiment:
- Avoid big grins – You can smile, just don’t overdo it. Remember you have to line up the side of your face with the front of your face. If your lips are going up at the side, then that’s not going to work. Showing your teeth will make it impossible to merge the two photos.
- Set up a monitor – I like my smile in a mirror, but hate it in a photo. Don’t ask me why this is. I just know that the process is a lot faster if I can see myself on a monitor, and I’m not running back to the camera after every photo.
- Look straight ahead – Again, this goes back to lining up your two pictures. Keeping a level face is essential. Otherwise, you’re going to have a nightmare in Photoshop. A good, neutral pose will make you editing part easier.
- Don’t stick your neck out – If your neck is sticking out too much, you will have a hard time overlapping the images. When you try to overlay your images, your neck will get too far away from your head.
- Wear a collar – It sounds silly, but it works. I didn’t do this because I couldn’t find a shirt I wanted to wear (or that didn’t need ironing), but it would have helped. Again, this is just a way to add a bit of extra overlay.
- Think about your hair – Facial features aren’t very that hard to line up, because they’re generally quite uniform, but hair is a little bit more predictable. Because of the way my hair changes across my face, it worked best for me to turn to the right. Think about what works best for you. Avoid extreme hairdos.
- Use natural light – You want to avoid having shadows on the wall in the background. Natural light is soft enough to create good lighting conditions. If you use studio lights, take a big step away from the wall.
- Use a plain background – Using a plain, simple background is a good idea. It just makes editing your pictures easier. Having buildings, trees or cars in your background will give you a headache during the next step.
2. Put Your Images Together
First thing you’ll want to do is open up your plain background photo in Photoshop, and use that as your background.
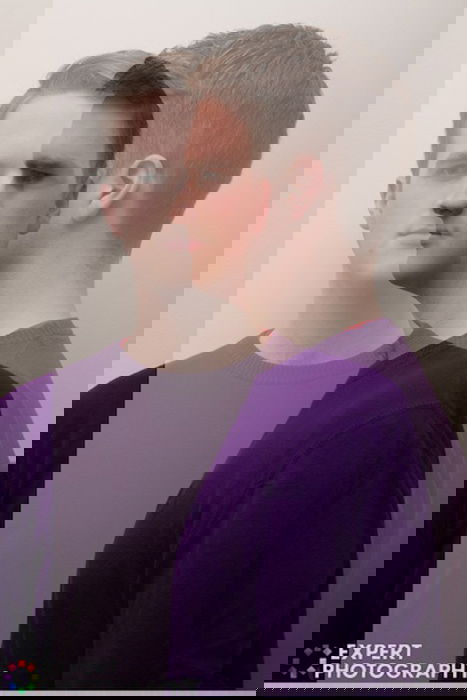
Then open up your other two pictures. It was my preference to place the side-facing image on the top, using layers. Take this top layer and change the opacity to 50%, so that you can see both images.
Then it’s simply a case of moving the top image so that it lines up nicely. Make sure that the neck isn’t too thin, and that all the key features line up.
Pro tip: If you’re trying to find a front-facing and side-facing image that match up in your computer, place your thumb on your screen (on a facial feature) and flick between the two. This makes it really easy to spot any differences.
The next step is to add Layer Masks to the top two layers. This is really simple, just go to Layer > Layer Mask > From Transparency. When you select a layer mask and paint on the image with black, you are deleting that area of the image. If you want it back again, you paint white back on. Simple.
Note: Make sure you’re selecting the layer mask (it is on the right). Otherwise, you’ll just be painting the image black.
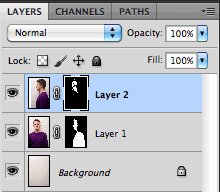
Next, take a black brush tool and paint on each layer mask, wherever the two images don’t overlap.
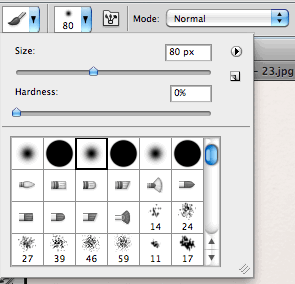
If you’re having trouble getting it right, try using the Magic Wand tool (W) to select the right areas. This takes a little adjustment, but I’ve just taken a quick screenshot to show you what I mean.
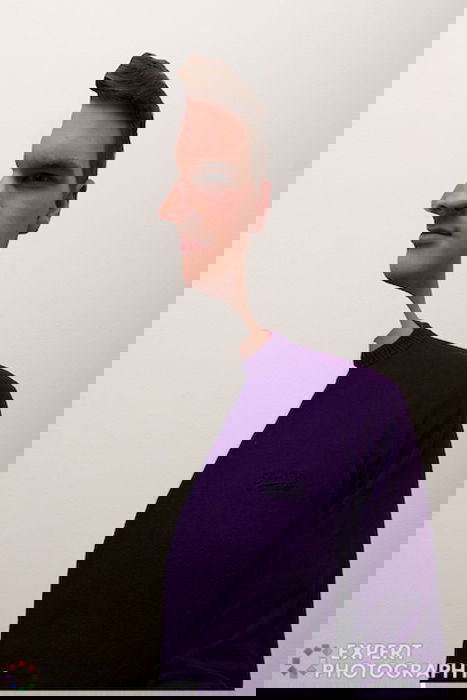
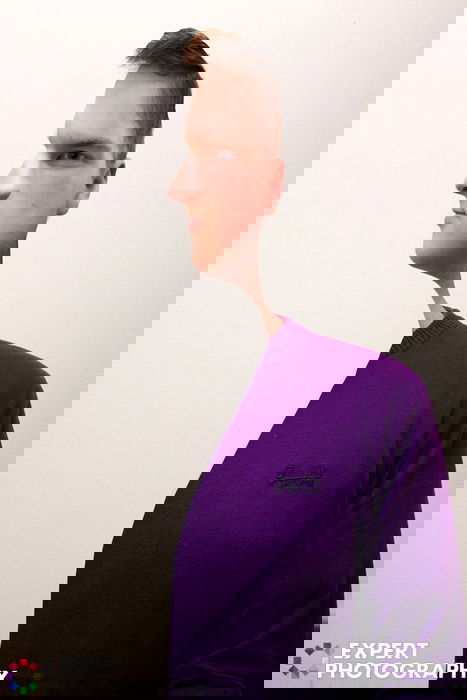
When you’re done and removed the top layer for comparison, it will look something like this.
Now comes the tricky part – merging the images so that you can’t tell what’s been done.
You can do this your way, but here’s what I did.
From the left-facing face I used:
- The top part of the hair
- Forehead and brow
- Half of the nose
- Lips
- Bottom of the cheek.
From the forward-facing face I used:
- The right part of the hair
- The eye
- Part of the nose
- Ear
- Right cheek.
To merge them, you can start by using the Layer Mask tool and picking out the parts that you want. But for these finer details, I suggest switching to a new tool, a softer brush. This makes for a smoother merge.
It becomes fairly intuitive from this point in, but if you find yourself really stuck, then I would suggest using a shade of grey over some areas of the skin tone. This effectively changes the opacity for that area of the image and works well for merging images.
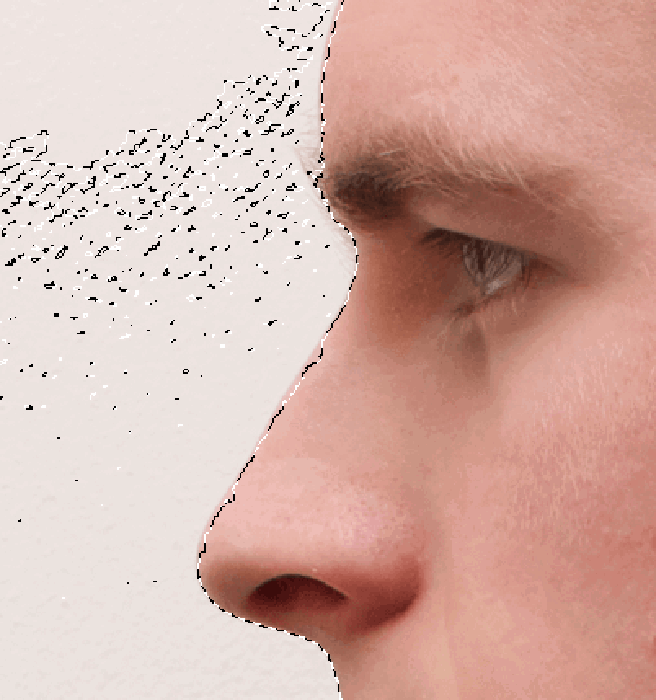
The area that you really want to pay close attention to is the nose. The trick is to have it both facing forward, and to the side, which you can see in the image below. It really messes with the eyes, but it’s still subtle.
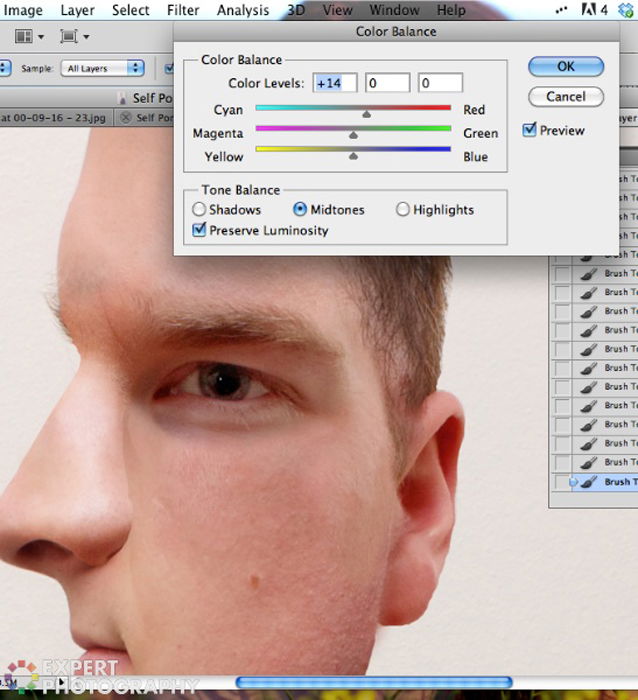
I found a discrepancy in the color between my images, so I adjusted the color balance slightly, and this made a dramatic difference. If you’re still having problems, try using the Burn and Dodge tools.
Conclusion
From there, you should have a complete, Picasso style image.
Don’t worry if it’s not perfect when you’re zoomed in. It will look much better when you save the image and see it as a whole. If you don’t like the results, you can always create a new portrait and give it another try. If I were to retake this photo, I would set the eye closer to the bridge of my nose, so that it would look more like it was looking to the left.
Now share it with your friends and freak them out. I’m thinking about putting it on my business card; you wouldn’t forget it, would you?
The Picasso style cross-section Photoshop tutorial is one of the topics we cover in our creative photography course, Wow Factor Photography. If you’d like to learn more, check out the course here.
Check out this awesome example from one of our students: