The Harris Shutter effect was created by Robert Harris of Kodak.
He made the effect by re-exposing the same piece of film three times. He did it through three different colored filters while keeping the camera steady.
The three colors used were red, green and blue (the colors of the light spectrum). In the areas where no movement takes place, these three colors combine to reproduce the original color.
You notice that the Harris shutter technique originates from the times of film photography. The good news is that you can reproduce it in the era of the digital camera!
Why You Should use the Harris Shutter Effect
The technique is a lot of fun to play around with when you’ve got some spare time. It is an easy way to impress friends with your images.
This effect can be used in any situation where you can keep the camera steady. It is a great way to show movement in a photo.
With the advent of Photoshop and digital cameras, the whole thing can be done a lot easier and without the use of filters.
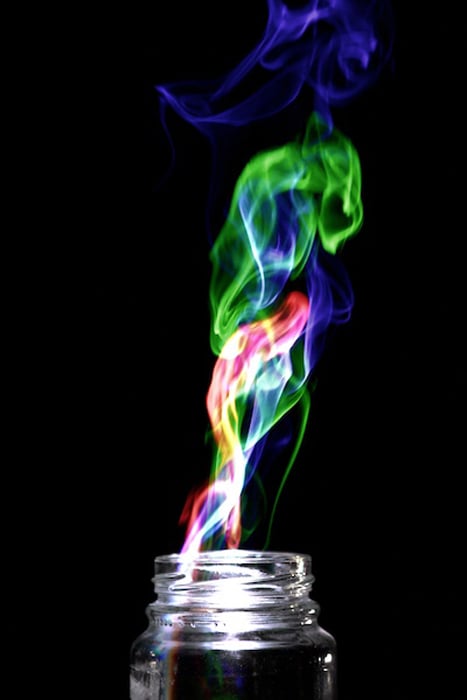
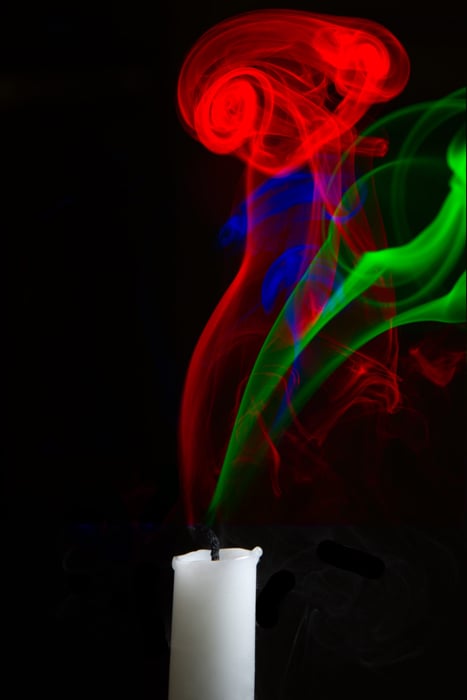
This post will show you how to produce photos like the one below. We are going to adjust the red, blue and green colors in post-processing.
How to use the Harris Shutter Effect
All the photographer has to do is to take three color photos of a scene involving a small amount of movement and an object that remains constant.
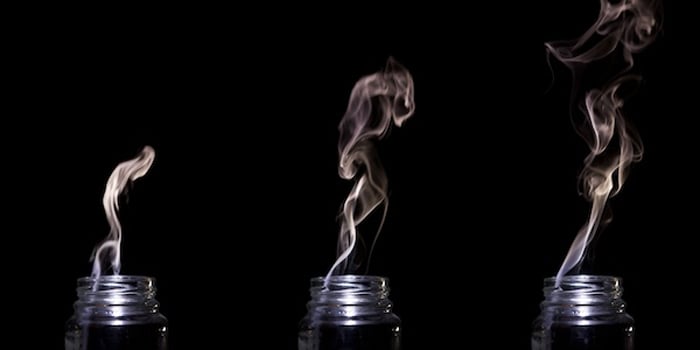
In my example above, I used the rising smoke out of a glass jar. The jar is the constant, and the smoke is the movement. For this effect to work best, the photos should be taken in quick succession like the ones below.
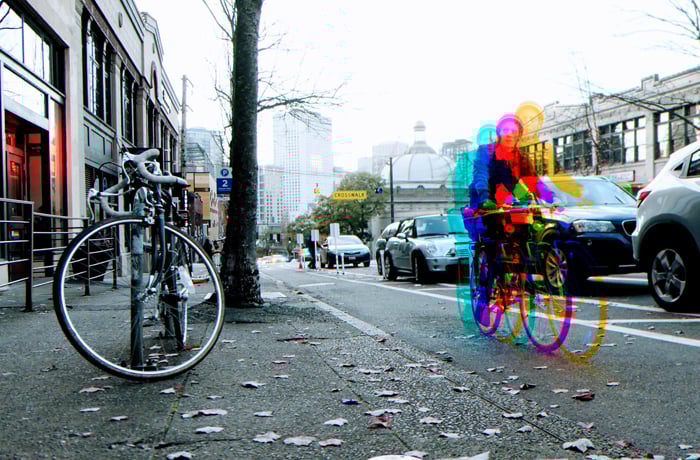
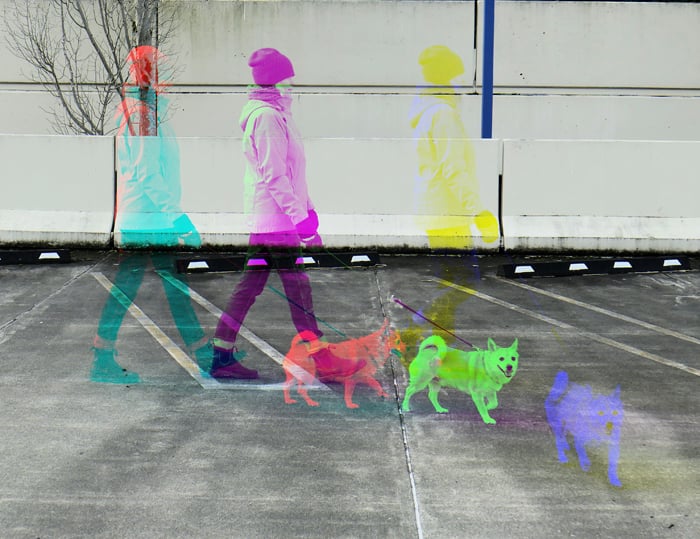
Scenes involving bikers or pedestrians walking on the street are also suitable. If you are in nature, waves, waterfalls or rivers are great subjects for this method too.
Step by Step Guide
After completing the shot, choose three suitable photos. Then you want to open the first image in Photoshop or the free program I like to use: GIMP. It’s not as good as Photoshop but, in many ways, does much the same thing and is ideal for what we’re going to do here.
We are going to change the red, blue and green colors in.
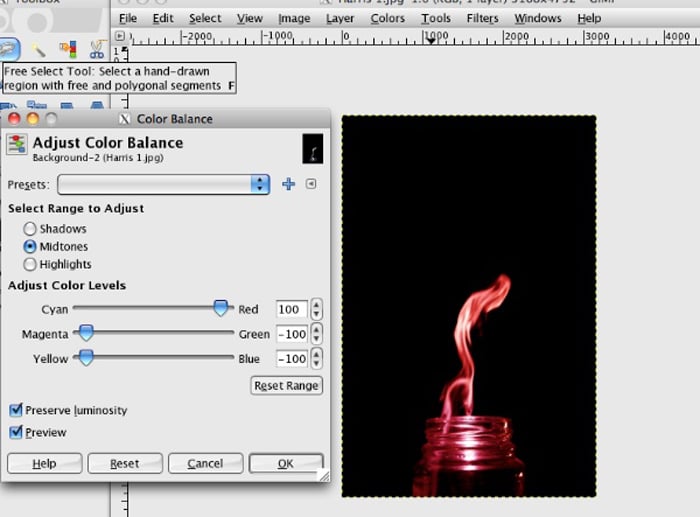
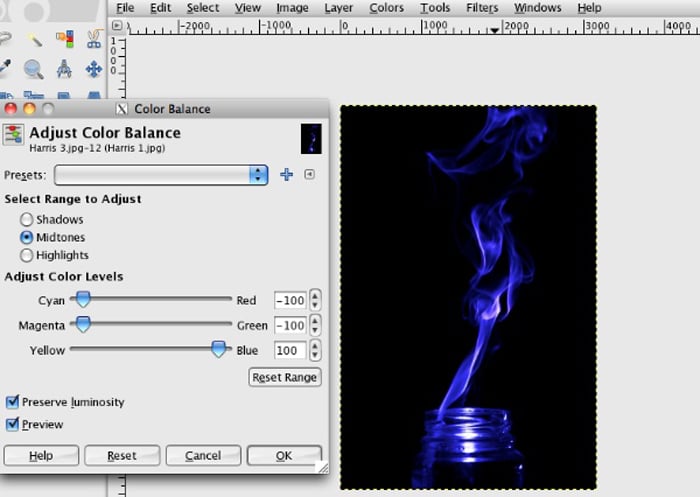
First, go to 'Colors' and select 'Color Balance'. Boost the red level while completely removing the green and blue level from that image. This is layer number 1.
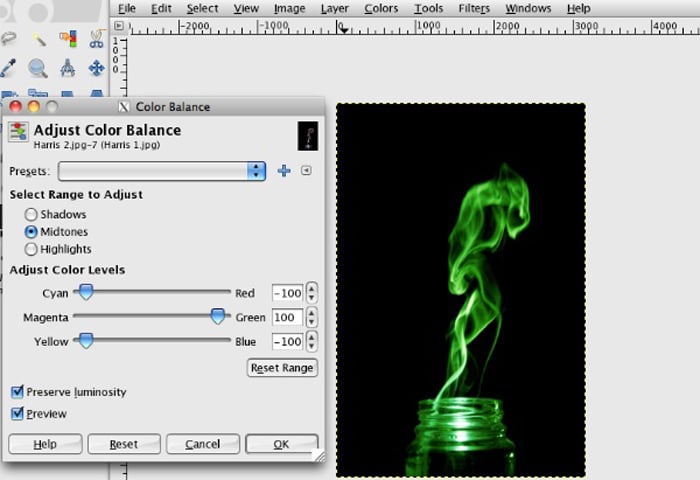
Next, go to 'File' and select 'Open as Layers…'. Select the second photo. Repeat the step above but, this time, remove the red and blue levels while boosting the green.
Finally, repeat the steps above for the blue channel.
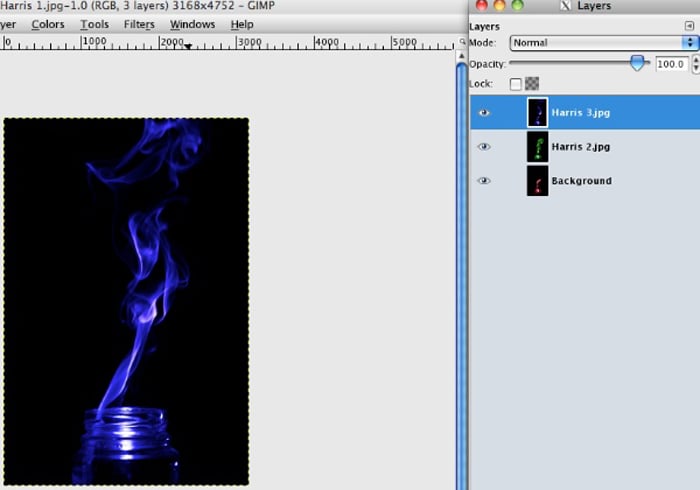
At this point you will only be able to see the blue photo so, to merge all three photos into one, you’ll need to open the layers dialogue. To do this, it's usually 'Ctrl-L' or 'Cmd-L'.
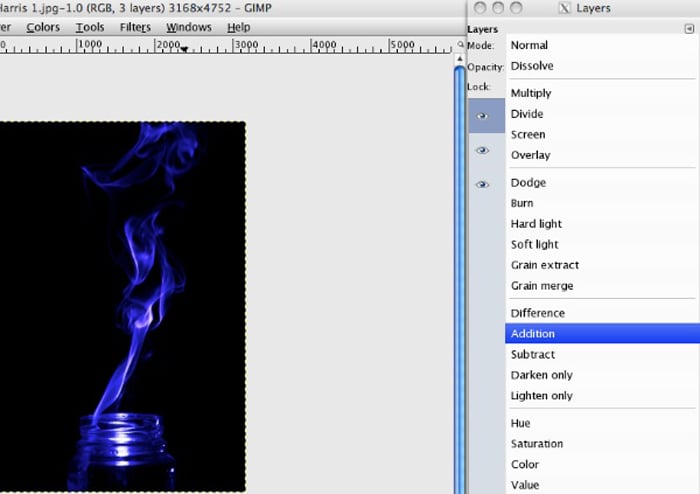
Once open, select the first of the two top layers and go to the dropdown box next to 'Mode:'. Select 'Addition' as demonstrated below. Repeat for both.
This will allow you to see all three photos at the same time as one image, completing the method.
Now all you have to do is to save it in the desired image format, and you’re finished.
Examples of Harris Shutter Effect
Harris Shutter effect is one of the topics we cover in our creative photography course, Wow Factor Photography.
Below are some of the photos taken by our students. If you'd like to learn more, check out the course here.
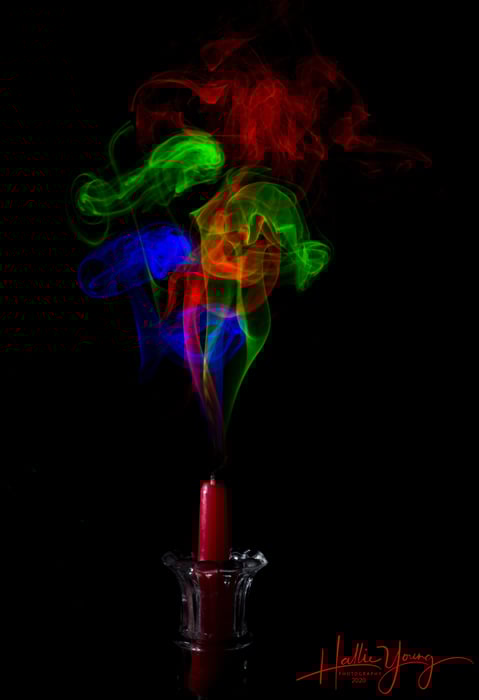
Harris shutter effect by Hallie Young
Harris shutter effect by Kenneth Loen
Harris shutter effect by Kenneth Loean
Harris shutter effect by Rob Mason
Conclusion
The technique invented by Robert Harris is a great way to add an exciting twist to your images.
It’s easy to recreate it with a digital camera and a good way to improve your photography and editing skills.