Knowing how to take a panoramic photo is a great thing to know. Especially when you live in a place like Alaska, where I'm fortunate to live. The "big sky" country of Montana has nothing on this place.
Trust me.
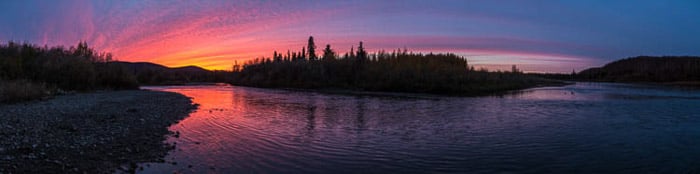
I often find myself standing before one of these grand landscapes. And sometimes I realize that one image isn't going to do the trick. This is where panoramic pictures come in.
Why Take a Panoramic Photo?
Even four or five images don’t do the Alaskan landscape justice sometimes. It's too big. The scenery is too grand to isolate down into a single frame.
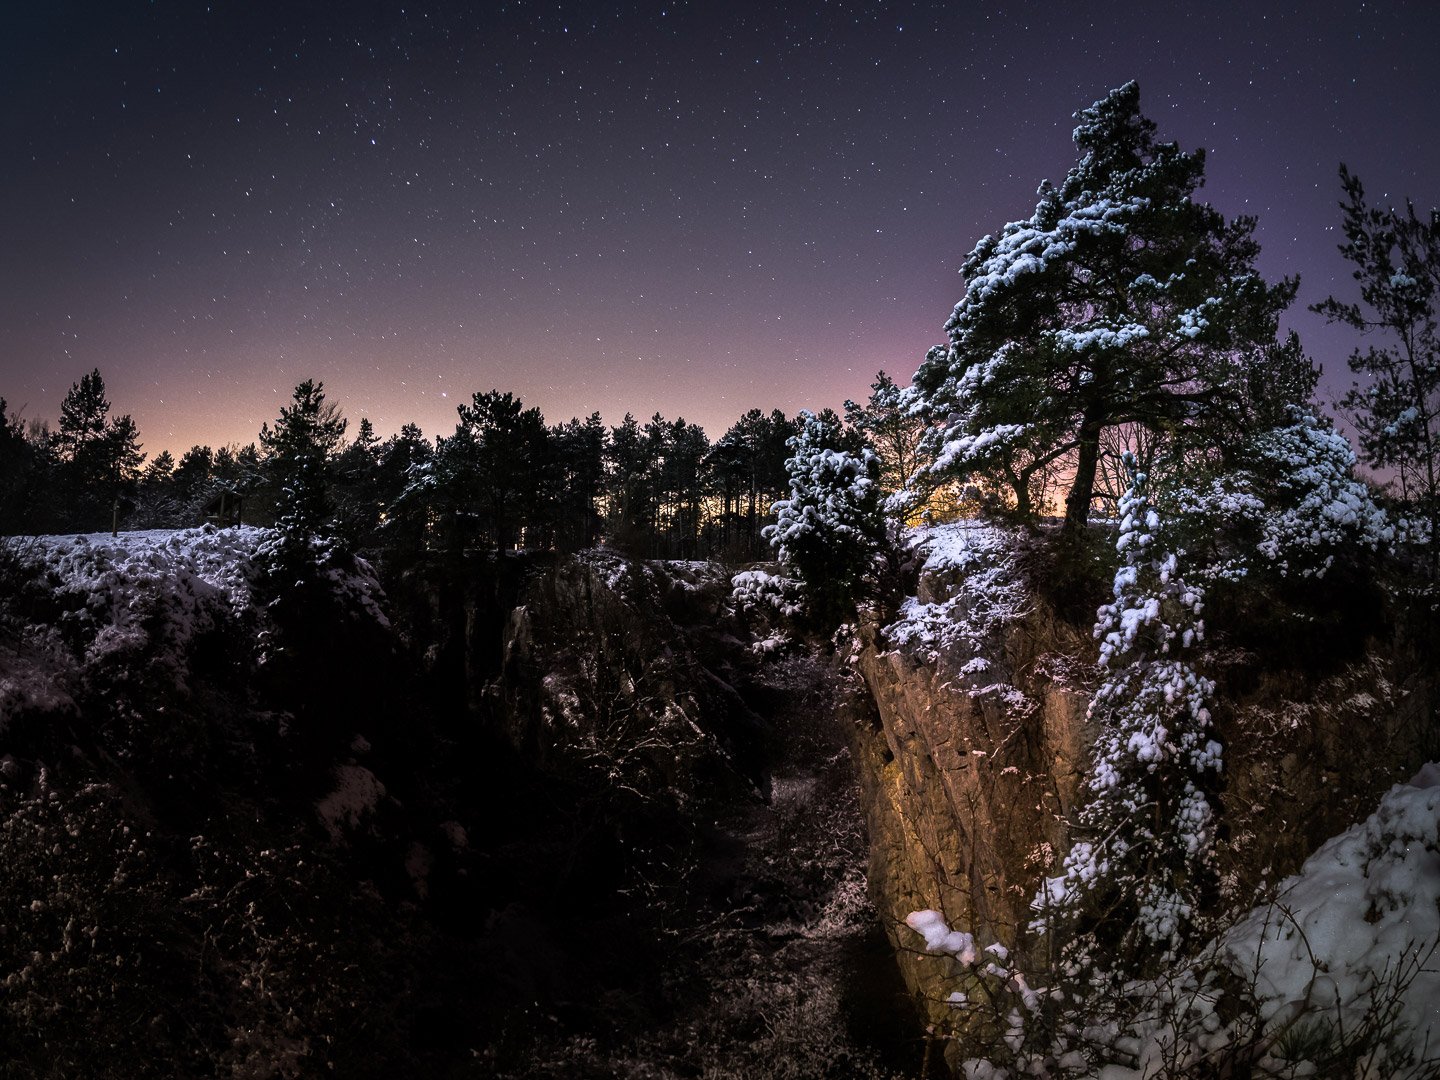
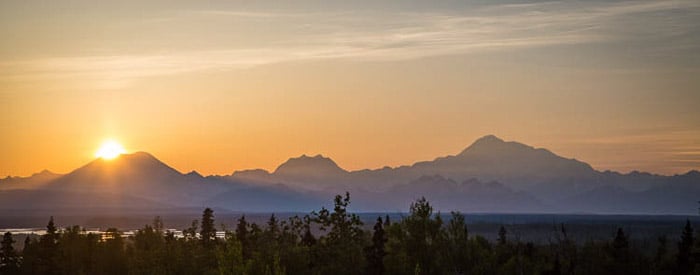
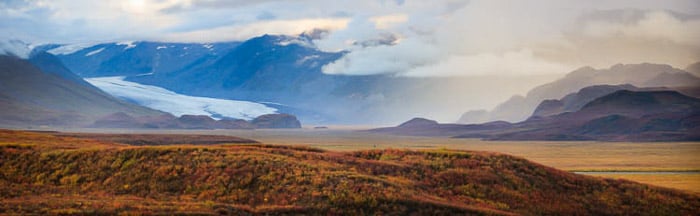
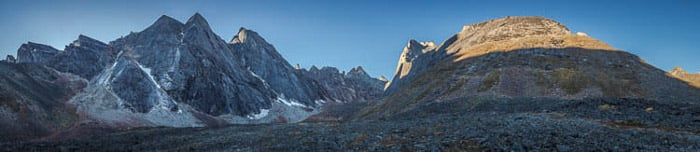
Last winter, I was photographing along a gravel beach near Haines, Alaska. It was late evening and the alpenglow was lighting up the mountains across the bay in bright peach light.
Shooting wide at 14 mm, the mountain range shrank to a small part of the frame. They turned into a jagged saw blade of color in a frame dominated by sky and water.
The composition didn't work. I wanted the details in the mountains while maintaining a sense of the vast landscape. A panoramic photo was the only way to go.
So I mounted my camera on a tripod, zoomed in on the mountains, and adjusted my settings. Then I began a slow pan of the landscape, pausing to make an image with the appearance of each new scene.
Horizontal panoramic pictures are hardly a novelty. iPhones and many point and shoots can create them in-camera.
But stitching together images from a DSLR, mirrorless, or other high-resolution cameras will yield better results. If you do it right.
They are also easy to mess up. Here are a few panoramic photography tips for creating panorama shots from a series of stills.
Panorama Photography Defined
To define panorama pictures is simple—it's a wide or (rarely) tall formatted image. You can create them by cropping a single image to a long rectangle. Never a square.
The better way is to use multiple images from a single scene. Digitally stitch them together to create a single, wide-format image. This will only work if you photograph from a single viewpoint.
Lenses
Take that wide angle lens off your camera, this isn't the time for it. A wide view or wide format photo is great for landscapes, but not for panoramic prints.
The optical distortion will mess with the process of stitching them together.
Select a standard lens or a short telephoto. Something between 40 and 100 mm is usually perfect. I've even used lenses as long as 200 mm, so don't be afraid to go longer if the situation calls for it.
Next, remove all filters from your lens, especially polarizers. Polarizers cause gradations across an image. These are impossible to fix in post-processing, so remove it from your digital camera before shooting the panoramic.
Cameras and Settings for Panorama Photos
Which camera you choose matters very little. Use what you've got. However, your file type and settings matter a great deal.
Always shoot panorama landscapes in RAW format. (All your images should be shot in RAW if you are a serious photographer, but that's a separate topic.)
When shooting panorama shots, RAW is best. It will allow you the greatest possible flexibility in post-processing those panoramic views.
You can adjust exposures, white balance, and other settings to match from one image to the next. This is great if you forget something in the field, or miss a setting.
You can use JPEGs too. But only if you are careful in-camera and manually adjust all your settings like ISO, exposure, and white balance. But I don't recommend it.
Exposure
Getting the right exposure may be the trickiest part of creating panoramic photography.
Brightness of your scene will vary from one side of your composition to the other.
Here is my process:
- Meter off the brightest part of your scene.
- Adjust your settings so those areas are bright, but not burnt out.
- Take note of those settings.
- Place your digital camera in manual mode and set your aperture and shutter speed.
- Take a few more sample shots, and check your histogram for burnt highlights or lost blacks.
- Adjust settings as needed.
Focus
You've nailed the exposure. Now you need to be sure your focus won't slip around during the course of your image series. Turn off the autofocus.
As you pan across your scene, you don't want your camera grabbing a new focus point each time. Set it so your subject is in focus and then don't touch it again until you've finished the series.

White Balance
There are two options for white balance.
The first, and easiest, is to set your white balance in-camera.
Using auto-white balance will cause your digital camera to adjust each time you click the shutter. This will lead to different color tones with each image in your panorama photo. Not what you want.
Rather than dealing with that, select some other appropriate setting. Sunny, cloudy, whatever. Pick one and stick with it.
The second option is to shoot in RAW and then adjust your white balance in post-processing. This works fine, but adds an extra step later.
For that reason, I recommend setting it in camera, while in the field.
Making the Panoramic Images
Composition
Creating each image of your series on a vertical format (portrait) is best.
First, this allows you to stitch together a greater number of photos for the same scene. And second, it allows you to compose with more "dead space" at the top and bottom.
When you take a panoramic photo, be sure to include a bit of extra space at both the top and bottom. This "dead space" will be needed later when you crop your final image.

Foregrounds, as in standard landscape photography, are important parts of panorama pictures. Including foreground elements that are very close to your camera may cause problems.
Each time you pan your camera for the next shot, the front of your lens will move an inch or two. If your foreground is too close, that shift will appear.
Your computer will not be able to stitch that part of the frame. This will result in weird, jagged shapes and visual echoes.
Your foreground should be further back in your frame. Keep it at least several meters away. It needs to be far enough so your small changes in camera position won't be obvious from one frame to the next.
Shooting
A tripod is very useful, but not essential. If you are using a tripod, level it.
With a level tripod, as you pan, your digital camera's angle will not shift up and down and you'll make the most of each frame you create.
It is possible to hand-hold and still create good panoramic pictures. You need to be very careful to keep your camera level as you move across your scene. If you begin to tip up or down, it may be impossible to stitch the images together later.
Compose your first image a full frame to the right or left of where you want your final image to begin. This assures that you will have adequate "dead space" on the sides of the image.
Then begin making your series as you pan right or left.
Overlap each shot between 1/3 and 1/2 of a frame. The overlap is what allows the computer to detect which images go where. So make sure to leave plenty of overlap.
Move across the scene making as many images as necessary to capture the landscape. Take a breath.

Post-Processing Panoramic Pictures
Check the White Balance of Each Image
On your computer (I use Lightroom), go through each image in your series. Check that the white balance of each image is appropriate and identical.
If you shot in RAW, assuring white balance continuity is easy. Check that they each have the same color temperature.
Check the numbers, if they aren't all exactly the same, change them so they are. If you set your WB in camera, you can skip this step.
Do not edit each image separately. Your first step in post-processing, after confirming the white balance setting, should be stitching the panorama landscapes together.
Once the images have been combined, you can worry about the rest.
Stitching
Most post-processing programs like Lightroom and Photoshop can create panoramic pictures. These aren’t possible without stitching software.
There are also speciality programs like PTGui. This is designed to create enormous images involving hundreds of individual photos.
If you get into creating huge panorama landscapes, look into programs like PTGui. But for most users, Lightroom and Photoshop are all you will ever need.
I'll go through the steps in Lightroom:
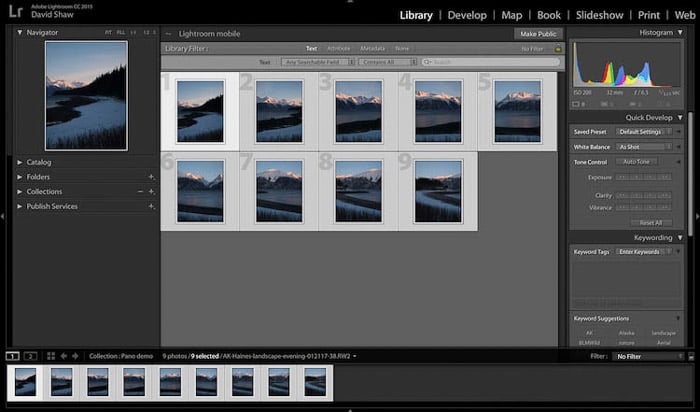
1. Select your images by clicking the first image in your series. Press the Shift key, and then select the final image. All the ones in between should now be selected as well.
2. Right click (PC) or Control-Click (Mac) and select Photomerge > Panorama.
3. A preview window will pop up offering three options—Spherical, Cylindrical, and Perspective. For most simple panorama photography, cylindrical is best. Feel free to click back and forth between these options to find the best option for your image.
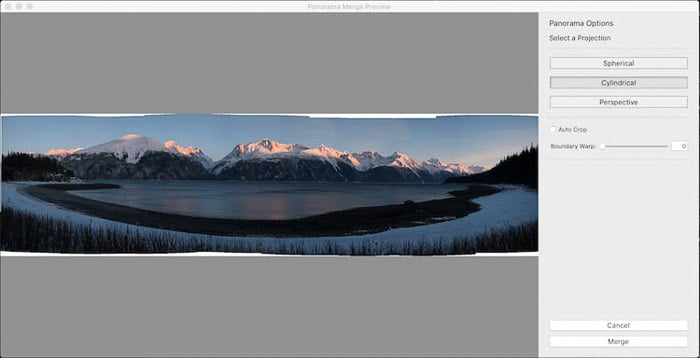
4. Click Merge. Assuming the source images were made appropriately, and the computer didn't have any trouble merging the images, the completed image will appear in your Lightroom Library. (
Or as a new image in Photoshop.)
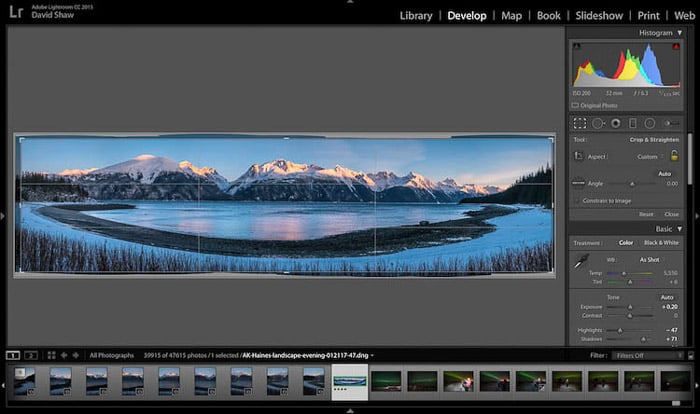
The panorama photo will likely have jagged edges. This is caused by your source images not lining up perfectly. But it’s not a problem.
Select the Crop tool and cut the jagged edges away.
This is why the dead space I noted earlier is so important.
Once your image is cropped the way you want it, you can post-process as you would any other photo in your collection.
Conclusion
Knowing how to take a panoramic photo is a great skill for those moments when a landscape is just too big, too dramatic, too epic to be captured in a single still.
I first started shooting panoramic pictures many years ago. I regularly overlooked simple things like remembering to remove my polarizer. Or failing to assure the same white balance from image to image.
If you mess up a setting or forget to remove a filter, the final image just won't work. There is nothing you can do about it.
You need to pay attention to those annoying little details so you don't miss your chance to create some epic shots. These panoramic photo prints really show these imperfections.
Check out our Epic Landscape Editing course to create larger than life landscapes!