The off camera flash has become a vital piece of gear in many areas of photography. From portraits to products and fine art to fashion, the flash gives you the freedom to create powerful and punchy photos.
You’re probably familiar with the traditional on camera flash. But what about the off camera flash?
In this post, I’ll show you how to use and become a master of the off camera flash.
What is Off Camera Flash?
Many modern cameras have flash built-in. When you’re taking your shot, the flash will pop up and give a burst of light. If a camera doesn’t have a flash built-in, there is the possibility to attach one. Both of these options are on camera flashes.
An off camera flash is a flashbulb that is not attached to the camera. You can move and position it completely independently.
It is synced to your camera, so it will flash when the picture is taken. But the light can be moved separately from the camera itself.
An on camera flash is always going to illuminate your subject head-on from the direction of the camera. But an off camera flash gives you more freedom with your flash photography.
The light can come from any direction you choose. It can be to the side or even behind your subject. It doesn’t have to be pointed at the subject at all.
An off camera flash allows you to use different kinds of lighting equipment. For example, you can play with umbrellas, softboxes, and beauty dishes.
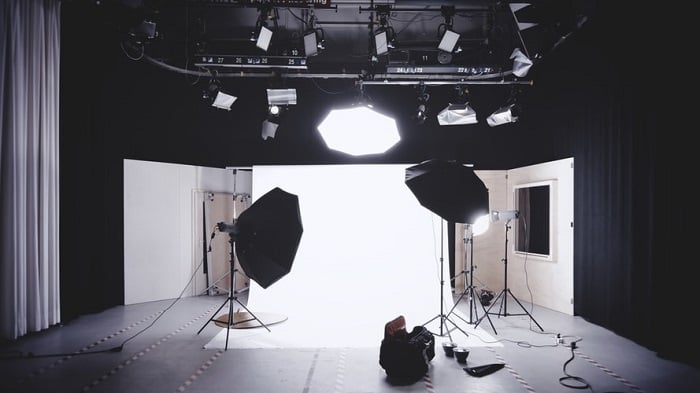
Photo by Alexander Dummer
Why You Should Use an Off Camera Flash
The premise of a flash is simple. It gives you more light when there isn’t enough natural light to expose your image. It means you don’t have to use a slower shutter speed.
But the flash power of an on camera unit can often be too harsh. A flash off camera gives you more flexibility. You have more creative control.
You can illuminate your subject without blinding them. As the flash can be positioned anywhere you like, you can create different lighting tones. It’s easier to control how much light you use in the photos.
With off camera flash photography, you can emphasize depth. An on camera flash will flatten your image by removing all shadows. By moving the light source, you can control shadows. You have the power to create or enlarge shadows in different areas of your image.
And they’re not just limited to the studio. Many fashion and portrait photographers use off camera flash photography when they’re shooting on location.
In many indoor settings, the ambient light isn’t enough. If the camera settings can get the desired effect, then an off camera flash is perfect for getting the shot you want.
You might not think that you’ll need a flash when you’re outside. But there are still many ways to use flash photography, even in bright sunlight.
You can use the flash to add light to dark areas. Or to even out the light from the sun. In addition, you can use off camera flash techniques to highlight or obscure sections of your images.

Photo by Travis Nesbitt
Equipment You’ll Need to Buy
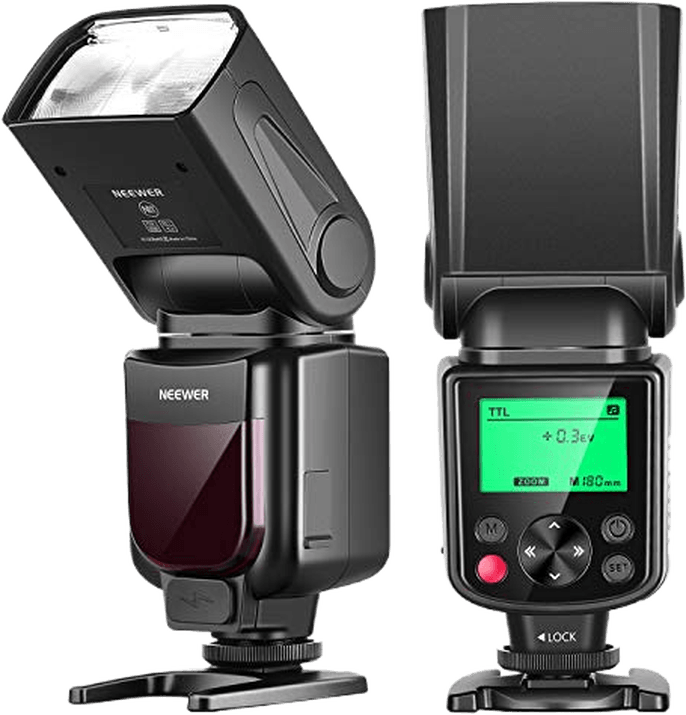
Flash Unit
When you’re looking to buy an off camera flash unit, make sure it is compatible with your camera.
If you use Nikon or Canon, selecting a flash is easy enough. Both brands make their own flashguns. So if you match the camera and flash brands, you won’t have to worry about compatibility.
For other brands, you will have to take more care. You need to know the flash you want is compatible with the exact camera model you have.
1. PC Sync Cable
A PC sync cable is the cheapest option for syncing the flash to your camera. The PC sync cable connects your camera to your flash unit directly.
Most professional-level DSLR cameras have a PC cable port. But some cheaper options don’t. Nor do some newer mirrorless camera models.
If your camera doesn’t have a PC port, don’t worry. You can buy a hot shoe adaptor that connects to the top of your camera. These are cheap and easy to find.
The main problem with the PC Sync cable is the fact that it’s a cable. It limits the reach of the flash. And it can cause accidents. The communication between the camera and the flash is also limited.
2. Off Camera Shoe Cable
The shoe cable is similar to the PC sync cable. Only this cable attaches to the camera’s hot shoe connection.
This connection type is more versatile as most DSLR and mirrorless cameras have a hot shoe.
Another benefit over the PC cable is that more information can be passed from the camera to the flash unit. It allows you to use different flash modes for varied lighting effects.
The shoe cable has the same main issue as using a PC sync. That is the cable itself. It can get in your way. And it limits your options.
3. Infrared Transmitter
I find the infrared transmitter the easiest and most reliable flash connection. And it’s the one I currently use for flash photography.
The performance is similar to the cable options above, only this transmitter functions wirelessly. As a result, it gives you a lot more room to maneuver.
You can move your flash further from the camera. But the transmitters need to be able to “see” each other. That means nothing solid can be between the camera and the flash unit.
Many manufacturers now produce cameras and flashes with IR sensors built in. This is useful and a handy saving. If your machine is a bit older, you can still purchase the transmitters separately.
4. Radio Transceiver
The radio transceiver is becoming the most popular flash connection for professional photographers. It’s easy to set up and reliable over long distances. And having no cables gives you a lot of creative freedom.
Many photographers favor radio triggers over infrared because the two units don’t need to “see” each other. This gives you complete control over the off camera flash setup.
Many brands offer great radio transceiver gear. But my top pick has to be the Pocket Wizard. It’s reliable and easy to use.
5. Slave Trigger
An optical slave trigger isn’t an off camera flash unit you can connect directly to the camera. Instead, it reacts to flashes of light and sets off another right away.
A slave trigger is only useful when you need two flashes for one shot. Another flash triggers it, so it’s not the original source of light.
The response time can also be a problem. The flash from the trigger will always be a fraction behind the original. So it can be tricky to get the sync speed just right.

Photo by Josh Dunlop
How to Use an Off Camera Flash
Once you have your gear, you can experiment with some off camera lighting techniques. It could take some practice to master it, but I can help you get started.
Here are a few ways to use an off camera flash to improve your photography.
1. Use Your Flash to Fill Light
You can read the full post on fill flash lighting here. But I’ll go through it here for you too.
The basic concept is to fill areas of your scene where light is blocked or faded. The dark spots could be caused by something blocking the primary light source. Or perhaps there isn’t enough ambient light.
In my photo below, the sun was a strong light source at the back of the shot. I didn’t want the model’s back to be underexposed, so I used a flash to fill in the light on the near side.
The sun to the rear is the main source of light. And now, with the flash off camera to the left as the fill light, the subject is evenly exposed.

Photo by Josh Dunlop – Fill Light
2. Recreate Ambient Lighting Indoors
You can set up one or two off camera flashes and point them at the ceiling above your subject. This is a great trick when you’re shooting indoors.
The aim is to fill the room with light that looks ambient and natural. It’s best to use light diffusers or softboxes with this technique. The flash power of a bare bulb is too harsh.
For the photo below, I set up a diffused flash on either side of the models. It produced a soft lighting effect that reduced shadows. And there’s no obvious use of flash. Instead, it looks like natural and ambient light.

Photo by Josh Dunlop – Room Light
3. Disguise Your Flash to Make the Lighting Look Natural
Sometimes you need to illuminate your subject, but you don’t want the viewer to recognize that a flash has been used.
To combat this, I like to place the flash somewhere that makes the light seem natural. I want the light to look like ambient light from the scene.
This is the technique I used in the photo below. I wanted the angle of the light to compliment the angle of my subject’s head. So I positioned the flash to the top-left of the shot. And it gives the impression of an external house light rather than a camera flash.

Photo by Josh Dunlop – Disguised Flash
4. Use Obvious Flash Separation to Capture Dramatic Lighting
I don’t always want to hide the fact I’ve used a flash. Sometimes, I want to harness the full effect of the flash output. I want the viewer to know that I’ve used a flash.
The flash can be used to make your subjects pop out from their surroundings, as is the case with my photo below.
I’ve used the flash to make my subject stand out. A head-on flash would have been too direct. By placing the flash in the bottom-left, the darkness in the top right is emphasized. It keeps the background obscured and brings my subject out of the darkness.
These are the things you need to think about when working with flash photography. What do you want your viewer to see? And where do you want them to look?
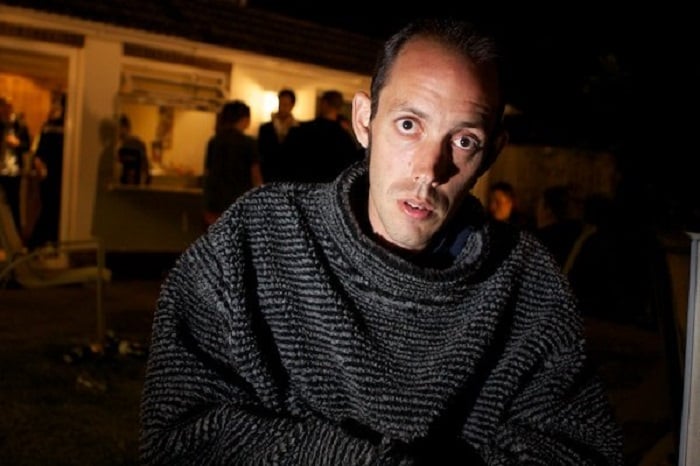
Photo by Josh Dunlop – Obvious Flash Separation
5. Try Using the Off Camera Flash as Set Lighting
The flash isn’t always used to light up your subject. If my model is already well-lit, I use the flash on other parts of the scene.
In the photo below, I positioned the flash in front of the two stones at the bottom of the frame (the model was holding the flash with her feet).
By positioning the flash in this way, I was able to lift the bottom of the frame. And the two rock pillars created a natural corridor for the light, illuminating her face.
Having the flash focus on the rocks also creates a contrast between the hard rocks and the soft skin of the model.

Photo by Josh Dunlop – Set Lighting
6. Avoid Unintentional Shadows From an Off Camera Flash
The main thing you need to watch out for when using an off camera flash is the shadows.
This is less of a problem when using a flash that’s attached to your camera. The light is always head-on, so the shadows will be behind your subject.
But when you’re using an off camera unit, you need to be aware of the shadows the flash will create.
One common example is the nose of a human subject. If you have your flash positioned to their left, their nose will cast a long shadow on the opposite side of their face.
Sometimes this will be the effect you want. But if not, it’s something you have to think about when using flash lighting.

Photo by Sazzad Aryan
Conclusion
Mastering the technique of off camera flash photography is a great way to take your work to another level. You only need a few extra pieces of equipment. And you can solve many lighting issues in the studio or on location.
No matter your photography style, an off camera flash can be a real benefit to your images. So if you’re into portraits or fashion photography, you can get out and practice today.
I hope this article has helped you understand off camera flash photography.
Ready to use the off camera flash technique? Check out our Dreamy Childhood Portraits eBook.