Night photography produces some of the most stunning images. But it can be exceptionally frustrating to capture if you don’t know what you’re doing.
Read on for all the information you need to master night photography.
1. Preparing for Night Photography: Composition and Settings
Shooting at night is a hard skill to master because shots take longer to expose. I compare it to shooting on film. You need to think a lot more about your camera settings and composition when thinking about how to take night photos.
Night photography takes place at any time between dusk and dawn. During this time, the range of colors can vary. Night photography draws on some of the same principles of black and white photography. For example, a factor that may once have affected the color in your photo may now change the contrast.
When there’s an inkling of light in the night sky, take a long exposure. You can end up with a blue evening sky when, in reality, it’s much darker outside.
2. Explore the Unknown
Night photography is a great equalizer. When it’s dark enough outside, it is like working with a blank canvas.
When it comes to finding the best locations for shooting at night, there are two possible ways. Either you stick to what you know and return at night with your camera, or you choose a new location.
Photographing at night can reveal views that people aren’t used to seeing. For example, with long exposures, you’ll start to see stars you didn’t realize were there. Areas you are familiar with will look different at night. But, because you know the place you may become stuck photographing the same thing.
By exploring the unknown, you are starting afresh. This is the best way to tackle night photography. Break out of your usual area and force yourself to see something new with your camera.
3. Use Manual Focus
Although the modern camera is great at autofocusing, when it is dark your camera will struggle to focus correctly. To ensure that your photo is in focus, switch to manual focus. Turn your manual focus to infinity (the ∞ symbol on your lens). Once you manually focus on your subject, don’t switch to autofocus. If you do, the camera will automatically autofocus again, and ruin your focus.
4. Ditch Night Mode and Choose Manual Settings
What is night mode in photography? Many DSLR cameras have a night mode which automatically sets a long shutter speed and high ISO. Instead of using the preset night mode on your camera, it is better to shoot in manual mode.
You should first have a good understanding of how exposure settings work. You may find it useful to read our guide to exposure. Three factors affect exposure. These are shutter speed, aperture, and ISO, and we use these differently at night.
So how do you expose for night photography?
The first thing to do is to take your camera out of auto mode and set it to manual mode. In manual mode, you’ll have full control over all of these exposure settings.
Low light conditions mean you’ll need to change your exposure settings to compensate to get the correct exposure. You may have to widen your aperture, slow your shutter speed and/or raise your ISO. But what is the best ISO for night photography? That depends on the rest of the settings. You might need to take a couple of test shots before you figure out the right exposure settings.
When I first find a scene that I want to capture, I take some test shots. I increase the shutter speed and take a photo with an exposure of 1 second. I do this to see roughly what it looks like with a little bit more light.
I then lower the ISO back down, as low as I can, to make sure that I don’t end up with a grainy photo.
And I use the extended shutter speed to capture the photo. See the image below shot with an exposure setting of ISO 400, for 30 seconds at f/5.
The majority of your photos will have a wide aperture so that you can allow in as much light as possible. This will result in a shallow depth of field in some cases.
But I always find it much less noticeable at night as the lack of light takes away some of the definition.
Sometimes you’ll be in a scene in which your subject goes way into the distance – to the point of convergence. You’ll need a narrow aperture to produce a wider depth of field.
The photo below was shot at f/13 with a shutter speed of 25 seconds at ISO 100. You can get away with these settings because you rely on a bright source of light to be the subject.
When shooting a scene like this, always focus about a third of the depth into the photo. This creates the best depth of field.
In very dark places, raise your ISO and shutter speed. At the same time, lower your aperture.
I took the photo below at night on the outskirts of the woods. Local light pollution was the only light source outside of the building.
The graininess of the photo, the blue of the sky, and the shallow depth of field make this photo stand out.
High ISO will produce a grainy result in your photos which you can use for creative results if you know what you’re doing.
Think before you shoot. Decide what you’re shooting and whether you want grain, a deep depth of field, or light trails. You’ll be able to work out the exposure settings for yourself from there.
One thing worth noting in low-light photography is to ignore your camera’s exposure meter: it’s irrelevant at night. The histogram is also going to appear completely different from what you’re used to.
Do some test shots and go with the settings that work for you after a bit of experimentation.
5. Try Bulb Mode
Bulb mode allows you to keep the shutter open for as long as you are holding down the shutter release button. This lets you shoot with a slower shutter speed than what your camera would otherwise allow. It is great for creative night photography for when you need a longer exposure, such as shooting light trails, star trails, or light painting.
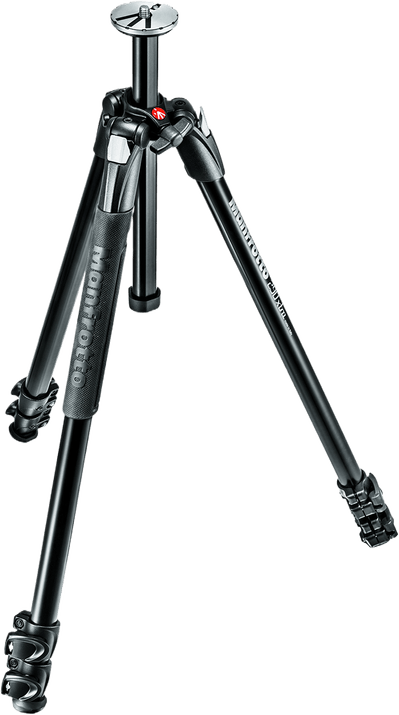
6. Get the Right Equipment
Besides a camera, what is needed for night photography? The most important gear is a sturdy tripod.
Using a tripod allows you to capture a long exposure. Shooting with a slow shutter speed gives you the ability to play around with cool effects. If you are shooting handheld, you’re a lot more restricted. You need to be able to hold the camera still for long periods of time.
There are a few points to bear in mind when using a tripod for your camera.
- Make sure it’s weighted down and sheltered from strong winds. Even slight movement of the camera will blur your photos.
- Use a shutter release cable to prevent camera shake or jarring the camera by pressing the shutter.
- Turn off any image stabilization as it will be counterintuitive. It will think that the camera is moving.
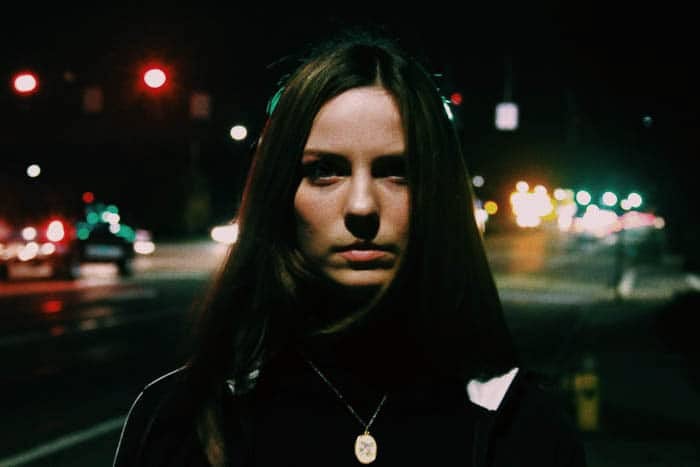
The photo below was shot at ISO 3200 at f/5 with a shutter speed of 1/6 of a second.
My lens didn’t have IS so I couldn’t use that. Instead, I focused on my subject’s lips as a central, reflective point for creative effect.
7. Shoot on Film for Cool, Creative Effects
There are some really cool ideas and effects that you simply can’t achieve during the day.
Shooting on film is good fun. If you’re stuck for which settings to use, I recommend bringing along your DSLR camera.
Test the setting on your DSLR camera, and then take the shot with your analog camera. That way, you can learn faster without wasting money on film.
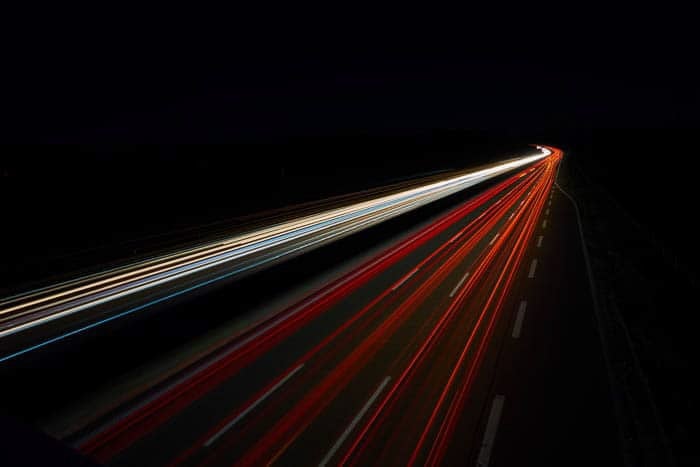
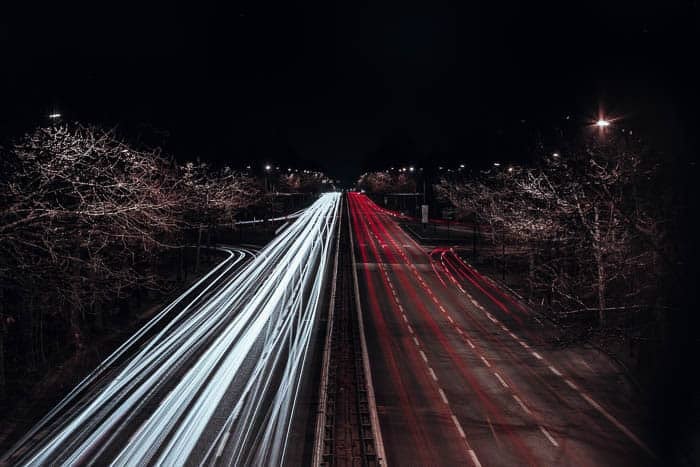
 8. Create Fun Light Trails
Light trails are fun for night photographers because, if you’re in control, you can do whatever you like with them.
For the photo below, I went into a local town in the middle of the night with some friends. I got one of them to drive through the scene while the rest of us captured their light trails with our camera.
The exposure settings of this photo were f/5.6, at ISO 100, with a shutter speed of 235 seconds.
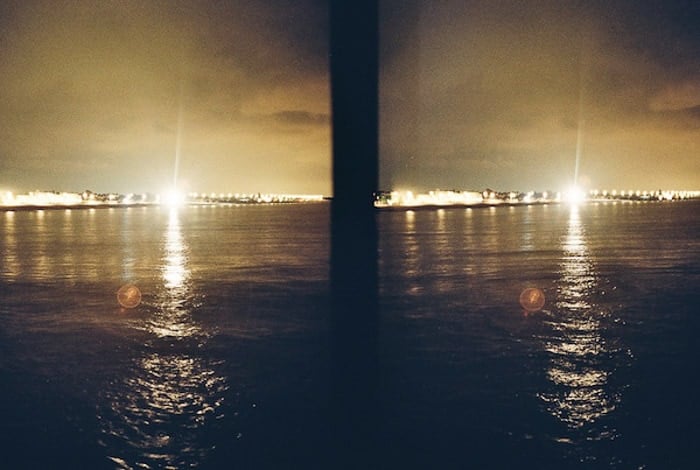
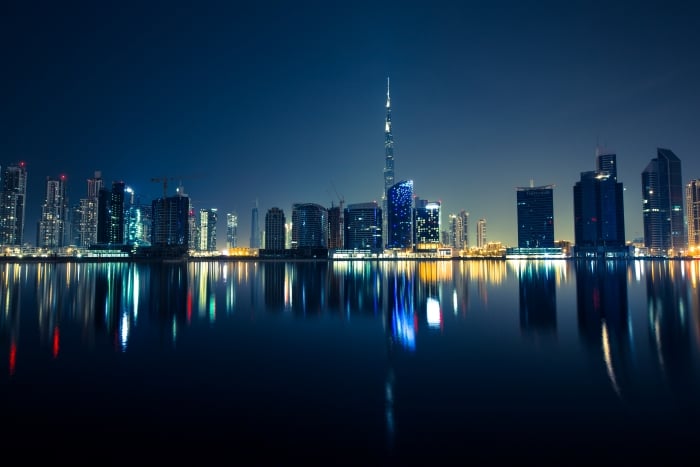
 9. Experiment With Reflections
Reflections are a lot harder to capture during the day as they’re dependent on the light in a scene. When you take away the natural light, you only have to worry about manmade light.
Try to use as much color as you can. These will merge in the reflections on the water. It’ll create a contrast between smooth and sharp.
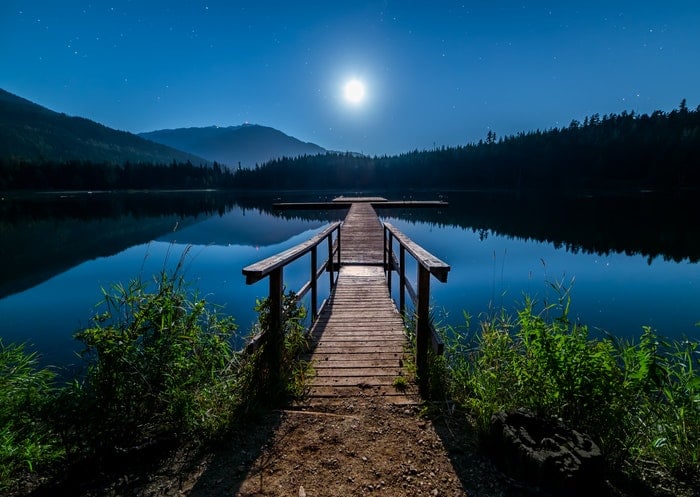
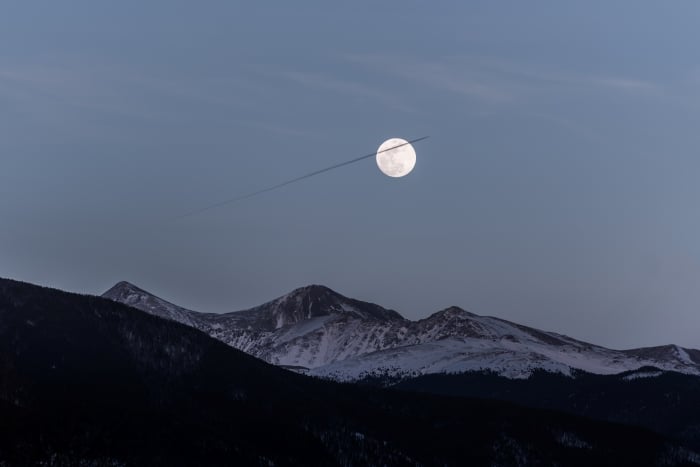
10. Use the Moon to Create Beautiful Night Photography Images
The moon is one of your only consistent light sources at night. It can produce some interesting effects for night time photography.
You can use also use the moon as a key part of your image. In the picture below, the moon is a focal point.
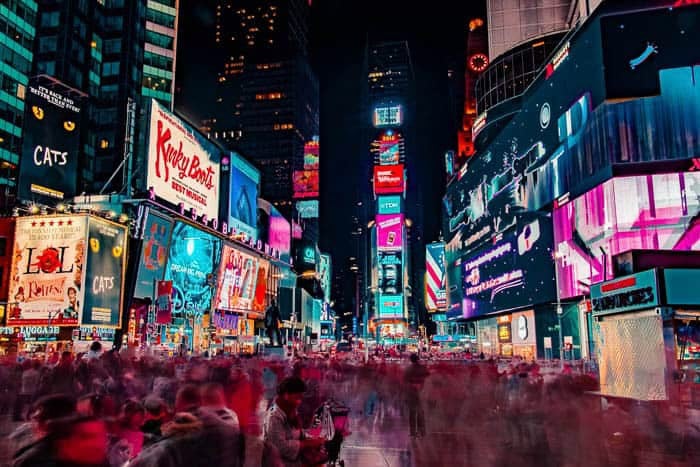
11. Capture Movement in Your Night Scene
Movement is an obvious choice for photos with longer exposures and a slow shutter speed. You can easily achieve the contrast between still vs moving objects with a tripod-mounted camera.
You can see this in the photo below, taken in New York with a 10 seconds exposure.
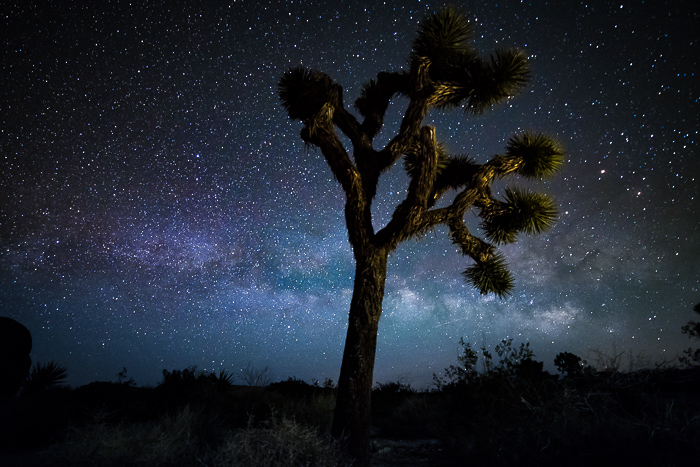
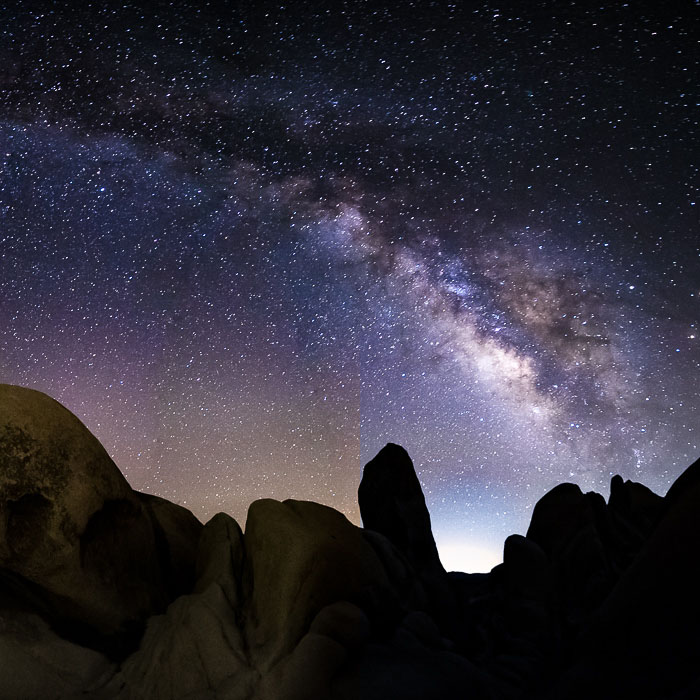
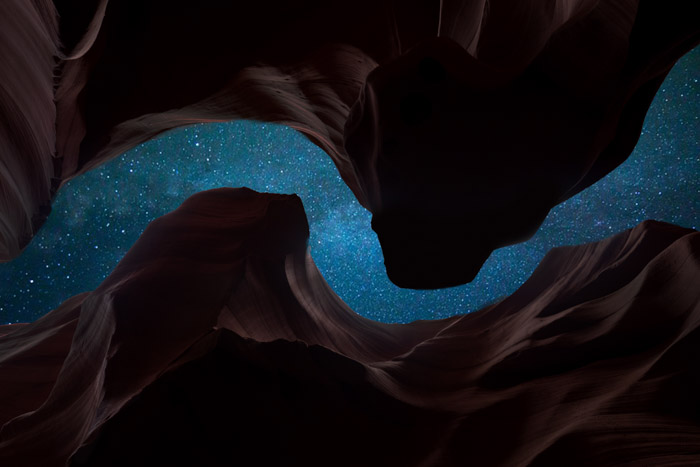
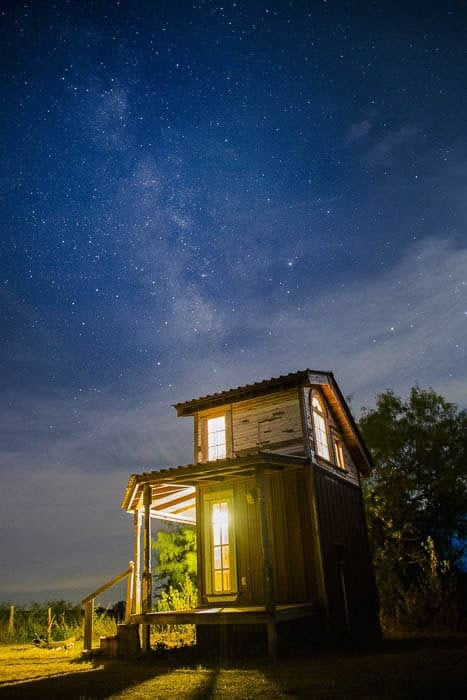
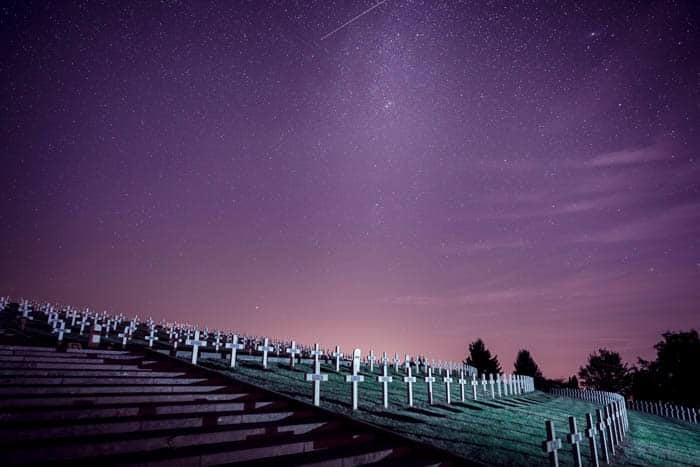
 12. Capture the Night Sky
Capture the night sky with long exposure for stunning results. Sky photos at night offer a variety of effects. You can include movement in the clouds or more definition in the stars or star trails, like in the picture below, taken on a 20-second exposure.
If you are wondering how to photograph stars, it is easy. To capture stars, you will need to set the shutter speed to less than 20 seconds. This will prevent star trails. To compensate for this low shutter speed for night photography, set the aperture as wide as possible and keep the ISO high as well.
Exposing any photo for long enough allows the small amount of light in the night sky to multiply enough times to produce this cool blue/purple color.
Are you wondering how to photograph the milky way? You can actually take incredible milky way photographs without fancy equipment. Learn how with our Milky Way Mastery course!
Conclusion: Night Photography
Night photography can be fun to experiment with once you understand the basics behind it. As long as you can understand the exposure settings, you can play with different combinations of the shutter speed, aperture, and ISO to create interesting shots. Switch up your subjects, use different light sources, and explore new compositions. If you are taking a picture with a long exposure, you need to make sure your camera is steady.
Why not check out our posts on shooting stunning star photography or star trails next!